Showing posts sorted by relevance for query recipes. Sort by date Show all posts

Thursday, April 19, 2018

Cacao Hazelnut Butter

It's you, not me. We are breaking up.
Like many of you, I love the taste of Nutella, but according to nutritionists Nutella doesn't love us back. Unfortuntely, this delicious treat contains a host of bad ingredients -- sugar, harmful fats, chemicals and only a trace amount of chocolate or hazelnuts. There's almost nothing in Nutella that young children or adults should eat!

Instead let's make our own homemade Not Nutella Spread. Like all the recipes on THE SAVVY SHOPPER, it is easy-peasy with better ingredients:

Cacao Hazelnut Butter

Ingredients:

1 cup hazelnuts (combine with almonds, if you wish)
3 tablespoons cacao powder (or cocoa powder)
1 teaspoon real vanilla
1 tablespoon of honey

Optional: Drops of skim milk (as a last step if the nut oils aren't enough for a creamy consistency.)

Directions:

1) Roast the nuts on a baking sheet in the oven for 10 minutes. Allow to cool.

2) Toss into a food processor and give it a whirl. Add the rest of your ingredients, and pulse again. 

3) At the end of the mixing process, you can add drops of skim milk to get a creamy consistency if it is needed. (Nutella uses palm oil and skim milk.)

Pour into a Mason jar and store in your pantry.

Why eat the supermarket shelf, unhealthy stuff when homemade is this simple? Speaking of baddd ... after staying faithful to the recipe at least once (for a guaranteed success!), you may decide to stray from the recipe by substituting different nuts or toasted high protein hemp seeds. Toss in a few dates (or figs) for sweetness. If you alter the recipe, like adding dates, do so one date at a time, so you arrive at a desirable and spreadable consistency and taste. 

When it comes to diet, let's be bad in a good way!


You may also enjoy:   
DIY: Drop Cloth Curtains
Homemade Antiseptic Cream
Lickety-Split Vegetable Beef Soup
DIY Lip Balm: Is It Worth The Cost?

Thursday, February 5, 2015

Why Is Ground Beef More Expensive?

Photo: Culinary Arts
The price of beef has gone up. The reason: Last year the midwest experienced a drought, so farmers reduced their herds of cattle and this created a beef shortage. 

Recently, I paid $4.99 (per pound) for ground round on sale! Not tenderloin, mind you, but the meat we use to make burgers! This got me wondering: How can a family stretch their beef budget? And ... what is the difference in all the types of ground beef on the market?

It turns out that some ground beef is made with the leftovers of other cuts of beef from the entire body of the cow. For ground beef to be called a specific type, such as chuck, round or sirloin, it can only come from that section of the animal. So here is what a consumer is buying:

Hamburger: Can have the trimmings from the entire cow. It can also have up to 30% of added fat. Personally, I never buy it. You have no idea what you are getting, nor do you know how many cows are used in one pound of meat.

Ground beef: Has the trimmings from the entire cow, but no extra fat can be added. The fat must come from the pieces of meat used, and it can have up to 30% fat. I don't buy this choice either.

Ground chuck: Chuck comes from the shoulder and neck sections of the cow. It is 15-20% fat. Many people like this cut to make juicy burgers and meatloaf. It is considered a flavorful cut of beef. Pieces of chuck, not ground, often get used in beef stew, or goulash, or stroganoff.

Ground round: Comes from the lean round and rump sections of the cow. It is 10-15% fat. This is a muscular section of the animal and some people consider it too dry to make burgers or meatloaf, but I prefer it. (I also use round and rump roasts ... or round pieces in beef stew. Lacking the marbling of fat, the meat is tough, but braising for a few hours will tenderize and turn it into a delicious meal. That's for a roast. Ground round isn't tough.) 

Ground sirloin: This meat comes from the sirloin section of the cow. It contains 8-10% fat and is the leanest and most expensive of the selections.

Although ground round and ground sirloin make a drier burger and meatloaf, I prefer its flavor to that of chuck, but like the white and dark meat of a chicken, it's a matter of individual taste. So decide for yourself. What's more, I can't tell much of a difference between ground round and ground sirloin, so I usually buy the one that goes on sale.

Now let's discuss how to stretch your beef budget. There are three easy ways:

1. Catch the supermaket sales. 

2. Buy larger quantities: Three pounds or more is often cheaper than lesser weights, then freeze the portions you don't use right away.
Photo: faithfulprovisions.com

3. Use less beef in your recipes: 1) Combine a can of mashed kidney beans with two pounds of ground beef to make a meatloaf {along with a diced onion, red pepper and celery! I also add a cup of oatmeal and two eggs + spices}; 2) Mix rice with a pound of ground beef to make stuffed cabbage; 3) Combine fresh vegetables with ground beef to make hobo packets, etc. These are delicious dishes. You won't miss cutting down on the beef.

I have a hard time giving up red meat altogether, but it's actually a healthy diet to eat less of it and/or to combine it with other food groups.

I'm more mindful these days about how food gets on the table. Now I consider my carbon footprint on the planet, as well as, the cruelty to animals, so I find myself eating less meat in general. However, it's so tasty and filling that I haven't given it up entirely ... not yet! 

How about you?

You may also enjoy:
The Story Of Stuff
Happy Earth Day: Think Green
Waste Not Want Not Native American Style
9 Ways  To Save Money At The Supermarket

Friday, November 25, 2016

How To Make Gravy From Roux

Photo: Food.com
My usual method for making gravy is to add cornstarch to the pan drippings for roast chicken, beef or turkey, but I didn't thicken the gravy with cornstarch on Thanksgiving Day.

Instead, I used flour to make a roux, which turned into the perfect gravy consistency. Cornstarch thickens gravy, but sometimes when over cooked, the gravy thins out again. I didn't want to take any chances of serving runny gravy on Thanksgiving. As it turns out, my gravy was such an unexpected hit that making gravy from roux will become my new regular way of gravy making.


What an unplanned pleasure for me! I tried something new, and it paid off. The day before Thanksgiving, I had a vague idea of using flour to thicken gravy, but I didn't know how to make roux. I knew flour tasted raw unless cooked a certain way, which is the sole reason I have always used cornstarch to make gravy. 


I'm so glad I took a risk! Furthermore, I considered buying a couple of jars of ready-made gravy as a backup, but decided against it. Succeed, or fail, the desire was homemade gravy all the way.


A dinner guest asked me to post my winning recipe on THE SAVVY SHOPPER ... and to tell you the truth, if I ever want to make the gravy again, I'll have to return here myself. So now my lovely readers, you understand why these recipes are published on the blog.
Before we start, know that I use bouillon cubes, but certainly chicken, or beef stock can be substituted.

Homemade Gravy
Photo of roux: The Creekside Cook

Ingredients:


2 tablespoons butter
3 tablespoons of flour
2 large bouillon cubes (I used Maggi chicken flavor.)
32 ounces water (or substitute 32 ounces of beef or chicken stock. I dissolve the bouillon cubes in the water ahead of time and let stand.)
1 teaspoon dried garlic
1 teaspoon dried onion powder
12 turns of the black pepper mill (= 1/2 teaspoon fresh pepper)
salt to taste (if using stock. No salt needed if using bouillon cubes)
1/2 teaspoon dried celery
About 1/3 teaspoon dried sage (I omit sage if making a beef gravy.) 

Directions:

1) Melt 2 tablespoons of butter into a large skillet. (After a roast, if I have a pan of meat stock and dripping to scrape, I do not use butter. Only if not enough liquid is left in the roasting pan, do I use butter. Fat needs to combine with flour to make a roux. You can get the fat from the chicken or beef drippings ... or you must use butter.


2) Whisk in 3 tablespoons of flour, and cook over a medium flame for 2 to 3 minutes. Keep whisking as the butter bubbles and simmers.


3) Next add the liquid from the meat to the roux: If you have pan drippings, scrape and use the juices. With enough juices from the roast, there is no need to add water. Use the meat juices as your liquid. If you don't have enough pan drippings, round out the liquid with water to get 32 ounces of liquid. (You can use wine as part of your liquid, if you wish).


4) Season to taste. Add the black pepper, dried garlic, onion powder, celery and sage.


5) Simmer and stir until the mixture thickens into gravy.


Leftover gravy using my recipe freezes well for several months, as opposed to, a gravy made with cream. (A cream, or milk gravy separates if reheated). Bon Appettè!


I really enjoyed hosting Thanksgiving this year. First of all, I would not have discovered this delicious new way (to me) of making gravy had dinner not been at my place. It takes having company over for many of us to apply ourselves. Thank you, Thanksgiving company, for your tasty contributions, not to mention your wonderful ... well, um, company! Until next time ...


You may also enjoy:

My Love Letter To Queen   
Nasty Gal For Edgy Clothes
The Best Anti-Aging Face Products For Less
9 Ways To Savy Money At The Supermarket

Friday, November 10, 2017

A Trip To The Japanese Grocery

Photo: Fat Free Vegan Kitchen
As we move into the nippy months of the year, I crave warm soup for dinner. New Yorkers eat out alone in restaurants all the time. I mostly don't unless I'm out of town. With a companion, I think of eating out as entertainment. Alone, I don't mind cooking dinner at home.

Miso soup (a food I 1st tasted eating out) is easy/breezy to make at home ... and for a fraction of the restaurant cost. So I keep a tub of miso paste in my refrigerator, along with dried seaweed and dried Daikon radish (an ingredient in many Japanese dishes). 
Scores of big supermarkets and health food stores carry miso paste. We have a convenient Japanese grocery in the neighborhood. 

Recently I bought:

Ryotei Aji Dashi Miso (paste)               $5.99
Sengirl Daikon (radish)                         $3.35
Tkon Cut wakame (seaweed)                $3.39
Akagi Joshu Akagi Soba noddles          $1.99
                                                             ________
                                                                  $14.62
A tub of miso paste makes lots of soup (about 45 - 50 servings), and it lasts a long time in the refrigerator. The dried seaweed and radish keep in a cupboard. At restaurants, a small bowl of miso costs $3.00, which totals $135 - $150 for the amount that one tub of miso paste makes. Wow, what a saving!

Miso Soup 

Directions:

For a serving of basic miso soup, combine about 2 tablespoons of miso paste to 2 cups of water. I taste the mixture for the right proportion. Increase the water or paste as needed.

Next, add any protein/vegetables/starchy ingredients you like:

Ingredients could include --

-- Tofu (cubed); leftover chicken or beef; seaweed; a handful of dried Daikon radish.
-- Other Vegetables: Often I toss in mixed frozen vegetables. You can also thinly slice and dice fresh carrots, onions, broccoli, mushrooms, spinach, snow peas or any root or leafy green vegetables you have on hand. Fresh vegetables you can saute in a pan first. Frozen vegetables I just microwave in a soup bowl with water first, then add the miso paste, dried seaweed, and dried radish during the last 2 minutes.
-- Sometimes I toss in cooked soba noodles (they are high in protein), sometimes I don't. Rice works too.
-- Season to taste: I like minced (or dried) garlic and fresh pepper. Ginger is another option.

As mentioned, I microwave one serving of miso (with ingredients) in a soup bowl. Large quantities can go into a saucepan to simmer on a stovetop.

From thought to bowl to table, preparation and simmering take about 10 minutes. !糖菓のappétit

Have you ever been introduced to a dish in a restaurant that you now make at home? 


You may also enjoy:
Eaters Beware
Jamie Oliver's Food Revolution
The Five Second Rule Is Untrue     
Secret Recipes From Popular Restaurants

Monday, March 17, 2014

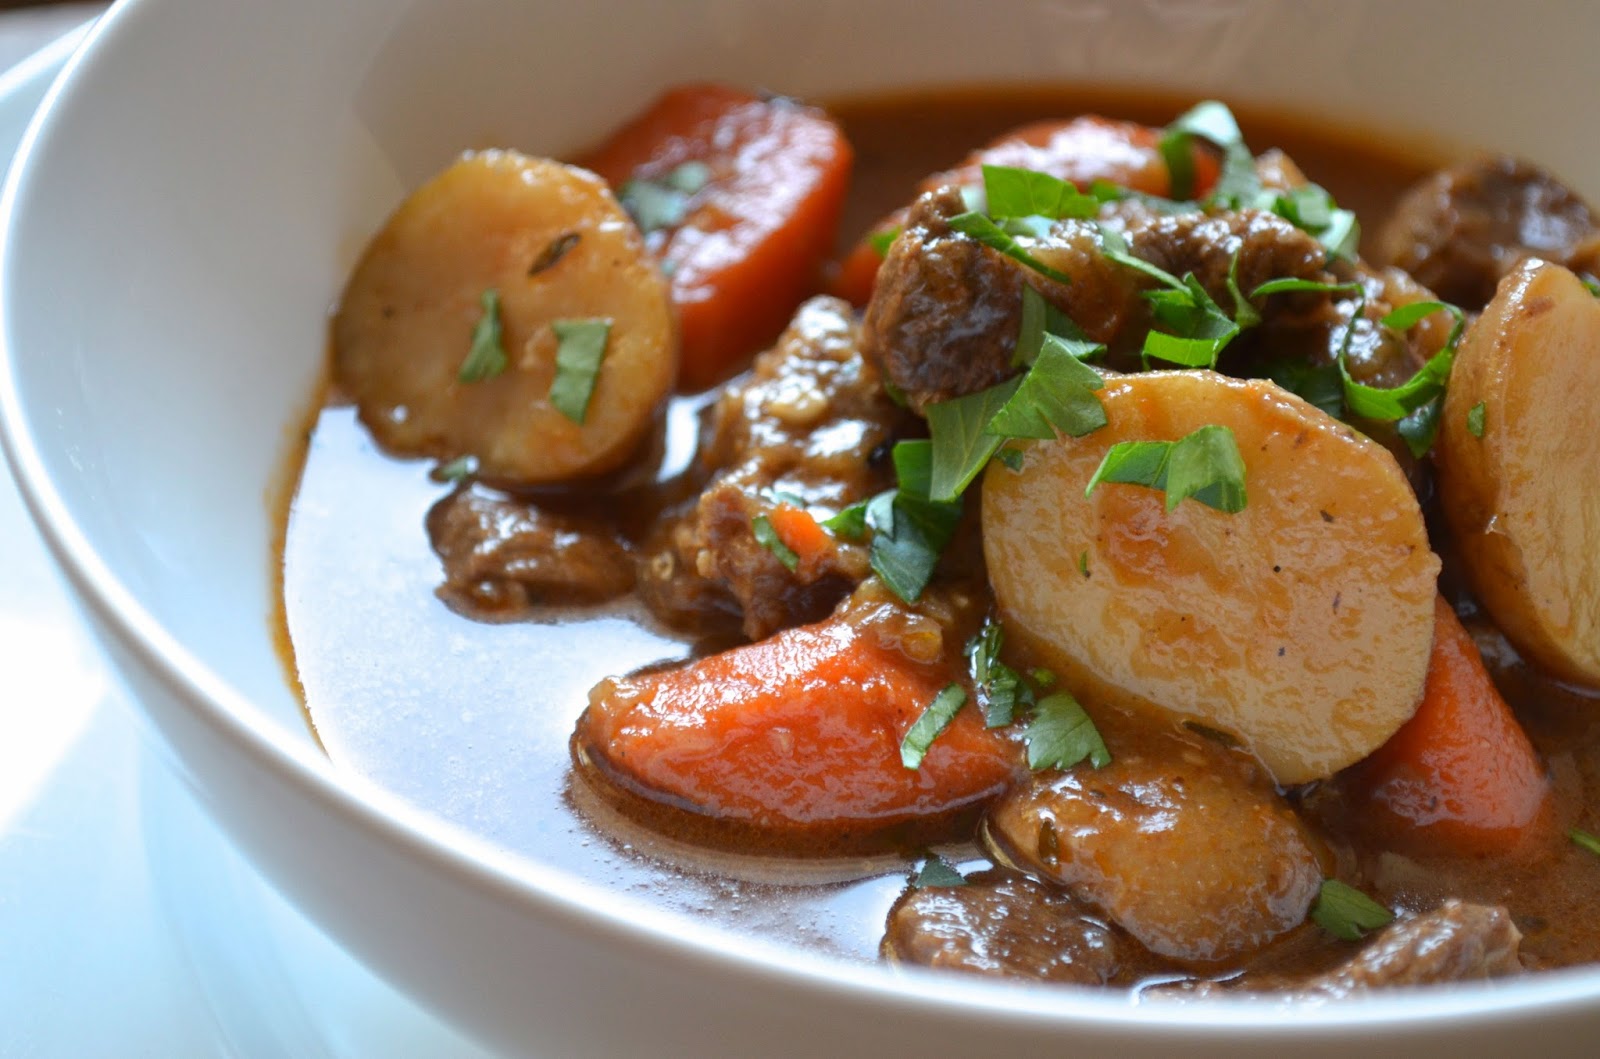
My Rustic Beef Stew

Photo: msbuenavida here
A hearty beef stew is a popular dish. Definitely, comfort food, which many of us grew up eating, often in winter. I made a pot over the weekend using ingredients I had on hand. It turned out especially delicious! Sooo. I'm sharing the recipe for a purely selfish reason ... so I'll remember how to make it again. I can always come back here to look it up! Here are all the ingredients that went into the pot:

Rustic Beef Stew (my style, um, um!)

Ingredients: 

½ - 2 pounds of beef, cut into cubes (chuck, top round, London broil, or whatever is on sale)
½ teaspoon salt
½ teaspoon ground black pepper (12 turns of the pepper mill)
1 tablespoon flour
1 onion, chopped, big chunks
3 stalks of celery, diced
4 carrots, cut into big bite-size pieces
2 parsnips, sliced
3 medium potatoes cut into chunks
1 tomato, diced.
1 teaspoon dried garlic
1 teaspoon onion powder
½ teaspoon dried rosemary
sprinkle of thyme
sprinkle of nutmeg
5 cups water
1 big bay leaf
dash of dried cilantro
dried parsley
A tiny sprinkle of red pepper flakes (Adds a kick without the heat. Careful: Too much adds heat.)
2 teaspoons Worcestershire sauce (Sprinkle and just eyeball the amount.)
2 large beef, or chicken bouillon cubes (Doesn't really matter which flavor.)
1 teaspoon vinegar

Optional: I had a handful of mushrooms in the refrigerator, so they went in, but don't go to the store for them; you have enough beef and vegetable chunks and flavor without mushrooms. In the spring if you have asparagus, dice and toss it in. Sometimes I have a turnup or lima beans or peas I add. Stew is a good dish enabling a cook to get rid of vegetables.

Directions: 

1) Sear the beef cubes with a tiny bit of olive oil in a 6-quart enameled cast iron pot until golden brown. While browning, salt and pepper the beef.
2) Next add the onions, celery, carrots, parsnips and spices as listed. Saute for about 5 minutes.
3) Add the water, bay leaf, cilantro, red pepper flakes, Worcestershire sauce, bouillon cube and vinegar.
4) Bring to a boil and simmer on low heat for about 1 hour.
5) Cut the potatoes into big chunks and dice the tomato; add to the pot and let simmer on low heat for another 1/2 hour, or so. Garnish with iron-rich parsley.
6) When the beef and vegetables are tender, dissolve 2 - 3 tablespoons of all-purpose flour in water and carefully add it to the pot to thicken the stew. Simmer on medium-low heat for about 5 minutes.

Tips: In cooking, if you want vegetables to disappear into the sauce, dice them up small. If you want the vegetables to remain spearable-with-a-fork, cut them into big pieces. With this stew, the only vegetables I dice small are the tomato and celery.
This evening a cup of green beans, a cup of peas and carrots, baby carrots, parsnips, potatoes, a big onion, and celery went into the beef stew.

The cooking time may vary, depending on the cut of beef you use. Cook until the meat is tender. Lean cuts of beef (for example top round London broil) are cheaper, tougher, and require a longer cooking time to break down the tissues, but are very flavorful when tender. Lean is good!

Extra tips: If you have frozen peas in your freezer, throw a cup or so into the pot at the end of the cooking time. It adds nutrients and a pop of green to the dish. Frozen peas and carrots and frozen green beans are perfect complements.

Click here to learn more about beef cuts.

Needless to say, beef stew is scrumptious on day 1 and excellent as leftovers. Serve with cornbread or hard-crusted, whole-grain bread.

My next post will address how to reduce your grocery bills, so check back in a couple of days for tips.

You may also enjoy:
Savor The Salt Of The Earth
Healthy Lentil And Quinoa Soup
Secret Recipes From Popular Restaurants
Waste Not Want Not Native American Style

Friday, June 11, 2010

Serendipity 3's Frrrozen Hot Chocolate Lite

Never deprive yourself of chocolate
New York City's Serendipity 3 is famous for serving big decadent desserts with rich toppings.  The portions are outrageous!  The cafe's a fun place to satisfy a sweet tooth for locals and tourists alike.  The Frrrozen Hot Chocolate, its signature drink, was featured on The Early Show and Oprah ... and extolled as something chocolate lovers must try before they die.  Well, that is a tall order ... but ... I think I've come up with a chocolaty and equally satisfying low-fat-low-calorie version that you can make at home.  My healthy shake is loaded with vitamins, minerals, and protein, the building blocks of the body.  And it's delicious!  I love smoothies and cold, slurpy drinks, especially on hot summer days.  My taste-alike drink definitely takes care of a chocolate craving.  It's so simple to prepare and costs a lot less too.

Here's my Frozen Hot Chocolate recipe:

1 envelope Carnation Dark Chocolate Instant Breakfast or 2 scoops of chocolate protein powder
10 oz skim milk
4 ice cubes
Add an extra teaspoon of real cocoa powder
Photos of Serendipity 3 taken by my friend Carolyn C.
Throw all the ingredients into a blender.  Blend for a few minutes until the ice is crushed, and the chocolate mixture is smooth.  Pour into a tall glass and serve.
Another of Carolyn's photos
You can top the Frozen Hot Chocolate with chocolate shavings, cocoa powder, and whipped cream if you like.  The extras are between you and your waistline.  Enjoy!

You might also enjoy:

Tuesday, February 12, 2013

A Deep Dark Chocolate Cheesecake For Valentine's Day

In celebration of Valentine's Day ... a deep dark chocolate cheesecake straight from the gourmet food magazine, Bon Appetit.  As this blog credits sources whenever possible, the recipe was created by Jeanne Thiel Kelley.  My habit is to tweak recipes a little bit, but not this time.  (Oh, no, I can't help myself -- I always cut the sugar in cakes by ½ cup.)  Here are the easy steps:

Ingredients:

Crust
24 chocolate wafer cookies (9 ounces)
1 tablespoon sugar
¼ cup (½ stick) butter, melted

Use a high quality 70% Cocoa Bittersweet Chocolate in the following steps. The magazine recommends Scharffen Berger.

Filling
1 9.7-ounce bar 70% Cocoa Bittersweet Chocolate, chopped
4 8-ounce packages cream cheese, room temperature
1 ¼ cups plus 2 tablespoons sugar
¼ cup unsweetened cocoa powder
4 large eggs

Topping
¾ cup whipping cream 
70% Cocoa Bittersweet Chocolate, chopped
1 tablespoon sugar

Bittersweet chocolate curls

Directions:

Crust
Preheat oven to 350°F. Butter 9-inch-diameter springform pan with 3-inch-high sides. Blend cookies in processor until finely ground; blend in sugar. Add melted butter and process until well blended. Press crumbs evenly onto bottom of oiled pan. Bake just until set, about 5 minutes. Cool while preparing filling. Maintain oven temperature.

Filling
Stir chopped chocolate in metal bowl set over saucepan of simmering water until melted and smooth. Remove bowl from over water; cool chocolate until lukewarm but still pourable. Blend cream cheese, sugar, and cocoa powder in processor until smooth. Blend in eggs 1 at a time. Mix in lukewarm chocolate. Pour filling over crust; smooth top. Bake until center is just set and just appears dry, about 1 hour. Cool 5 minutes. Run knife around sides of cake to loosen. Chill overnight.

Topping
Stir cream, 6 ounces chocolate, and sugar in heavy medium saucepan over low heat until smooth. Cool slightly. Pour over center of cheesecake, spreading to within 1/2 inch of edge and filling any cracks. Chill until topping is set, about 1 hour. DO AHEAD Can be made 3 days ahead. Cover with foil and keep refrigerated.  Release pan sides. Transfer cheesecake to platter. Top with chocolate curls. Let stand 2 hours at room temperature before serving.

I say, go out to dinner and have this decadence waiting for you at home.  Pair it with good coffee, or a fine tea like those from Teavana.  Some restaurants charge more on Valentine's Day and may be crowded, so many couples prefer to eat at home.  You can always order in.

Warm, good wishes for glitter and gold and tender loving care.  Happy Valentine's Day! 

You may also enjoy:
Happy Saint Valentine's Day  (How did the day begin?)
Happy Valentine's Day  (ideas for celebrating)

Wednesday, December 13, 2017

Scottish Shortbread

Photo: Nikki
When I was a teenager, I began helping my Mama make Christmas cookies. Mostly, we worked separately, not together. One person might peer into the kitchen to see how it was going, but the cookie baker did her own thing, while the other person walked in and out. Over the years, some cookies fell to my Mama to make, and she would ask me to make certain varieties I hit upon that she liked. 

My Mama made the best butter cookies, and I don't know how to make them since she always did it. Plus, I don't have the patience to decorate them. The cookie varieties I make are done the moment, I pull a tray out of the oven. After I bake a cookie, it's annoying to have yet another step before they are ready to eat. I've mixed, laid out the dough, baked, washed bowls ... I mean, the work is done. Mom can handle starting over to decorate baked cookies. Her butter cookies are festive and delicious. What a fancy-pants, fusspot ... going back to decorate done cookies.😊

Well, this year for first time, I made a butter cookie for Christmas. But bah humbug, I'm still not going to decorate it. Therefore I made Scottish Shortbread. Same ingredients, but no colored icing, no sprinkles, no chocolate chip eyes. Just a good traditional butter cookie. Here is the recipe:

Scottish Shortbread
Photo: Gooseberry Patch

Ingredients:

1/2 cup butter (= 4 ounces)
1/4 cup sugar (= 2 ounces)
1 cup all-purpose flour
a sprinkle of salt
Extra flour for the rolling surface.

Optional: I add 1 teaspoon of vanilla, 1 egg and 2 tablespoons of ground flax seeds (none are in traditional Scottish Shortbread)

I can't get the dough to form a ball without the egg. My mom never makes butter cookies without vanilla, and my friends like the ground flax seeds, so lately I add some to all the white flour recipes I make. (For authentic Scottish Shortbread, leave these optional ingredients out.)

Directions:

1) Cream together the butter and sugar. Add vanilla and egg if desired.

2) Combine the flour and salt. Toss in 2 tablespoons of optional ground flax seeds.

3) Add the dry to the wet ingredients until you produce a dough. 

4) Knead for 5 minutes. If the dough gets soft, refrigerate it for a few minutes, then knead again for a minute before rolling the dough out flat on a surface. Aim for 1/2 inch thickness.🎄👑🐫

5) Cut into 1-inch width rectangle stripes. Eyeball it. Place on an ungreased baking sheet about 1-inch apart. Prick the cookies with a fork.

6) Bake in a preheated 350 degree F oven for 20 - 25 minutes.

Sometimes there's nothing better than a simple butter cookie. I will enjoy making these Scottish Shortbread cookies for Christmas (and teas during the year). If you must be a fancy-pants, fuss-pot (Mom) dip half of each shortbread cookie in melted dark chocolate mixed with a bit of cooking paraffin.
For a Christmas batch, I tossed in 1/4 cup of ground walnuts and 2 tablespoons of ground flax seeds.
Double or triple the recipe for Christmas cookies. A single portion is the perfect amount to bake for teas. Tastier than most store-bought cookies and easy!

Photo: Mother Earth News


You may also enjoy: