Showing posts with label chicken. Show all posts

Tuesday, April 25, 2023

Homemade Chicken Fingers

Deceptive photo, they weren't burnt or dry.

My senior mom has become a very picky eater. The supermarkets where I shop don't carry Tyson's Chicken Tenders, meat in a form she'll eat, so I bought 2 huge chicken breasts (nearly 3 pounds at $1.99 per pound = $5.49), cut them into pieces with my trusty meat shears, and made homemade chicken fingers for the 1st time ever in my life. How hard could it be? Not hard at all as it turns out. So crispy, tender and delicious, I'll post my easy-breezy recipe below (so I too can make it again):

Debbie's Chicken Fingers

Ingredients:

Chicken breasts - I had 2.76 pounds.
For the crust:
1 cup oatmeal
3/4 cup dried parmesan cheese
1 teaspoon homemade saltless creole seasoning (I now made it without salt and add salt or bouillion cubes in recipes.)
1  1/2 teaspoons Himalayan pink salt (It's what I had.)
1 teaspoon black pepper
1 teaspoon smoked paprika
2 teaspoons dried garlic
1/2 cup milk

Directions:

1) Cut the chicken breasts into chunks or thick strips.
 
2) Into a food processor add the oatmeal flakes, parmesan cheese, salt, pepper, smoked paprika, garlic, and creole seasoning. Pulse until finely ground and pour into a mixing bowl.

3) Spray an aluminum foil-lined baking sheet with cooking spray or grease lightly with butter.

4) Wet the chicken pieces with drops of milk and drop them into the dry oatmeal mixture. You need about 1/2 cup of milk to sprinkle on the chicken pieces.

5) Arrange the coated chicken fingers on a greased or sprayed baking sheet and bake in a preheated 400-degree F oven until brown. The chicken meat will turn from pink to white in about 20 minutes.

Chicken fingers (the whole breast) or tenders (the pectoralis minor part of the chicken) are about the only way my mom will eat chicken nowadays. She ate them, so tonight we got the job done.

Freeze the leftovers. 

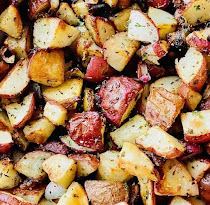
A side dish: Roasted Potatoes

Ingredients

3 potatoes, unpeeled and cubed
1 small onion, diced
olive oil
garlic powder
parsley 
tarragon
1 1/2 teaspoons Cajun or steak mix seasoning
A few turns of the peppermill

Directions:

1) Wash, slice or cube unpeeled potatoes (any variety) and onions.  

2) Drizzle with olive oil and sprinkle with the seasonings.

3) Transfer to an olive oiled, foil-lined baking tray.

Bake in a preheated 350 degrees F oven for 25 - 30 minutes.

Another side: BBQ Beans

Bon Appètit!


You may also enjoy:

Friday, December 2, 2022

Chicken Noodle Soup

Photo: iStock

Chicken noodle soup is sometimes called the ultimate comfort food. At home, it's usually made with leftover chicken, but making it fresh from scratch gives it an even better flavor. The following takes all of 30 minutes and you can use chicken breast or ground chicken, both are super tasty, and one of them will be on sale at the supermarket. Here's a super easy recipe:

Chicken Noodle Soup

Ingredients:

Choose one - Both are delicious: {a} 1 lb of white chicken breast; or {b} 1 lb of ground chicken
1 onion, chopped
4 celery stalks and leaves, chopped
2 - 3 large carrots, scraped and sliced
8 cups of water
2 large cubes of chicken bouillon (or 4 small cubes)
1 teaspoon of dried garlic (or 4 - 5 fresh garlic cloves, minced)
1 teaspoon dried thyme leaves
1/2 teaspoon coriander
a shake of parsley
1 bay leaf 
5 ounces dried noodles - chooose one: flat egg; shells; or curly

Optional: Toss in 1/2 cup of frozen peas at the last minute of cooking.

Directions:

1) {a} If using chicken breast, pouch them in white wine and (if needed water) for 10 - 12 minutes and after they are cooked, dice into cubes.
{b} If using ground chicken, brown it in a tablespoon of extra virgin olive oil in a frying pan. Salt and pepper to taste. Toss the chicken of choice in a stock pot or large saucepan.


2) Add the water and chicken bouillon.

3) Toss in the sliced and diced vegetables: onions, celery, and carrots.

4) Next add all the spices. If you use ground chicken, toss the garlic in as you brown it - searing gives the garlic extra flavor, but if you pouch chicken breast, just toss the garlic in the stock pot along with the cubed cooked chicken breast.

5) Once the vegetables are in the pot, cover and simmer for 15 minutes.

6) Finally add the dried noodles and simmer until they are al dente.

7) Toss in 1/2 cup of frozen peas at the last minute if you wish. The green looks lovely.

Chicken noodle soup is a later edition in my cooking repertoire, but after I ate canned soup of mostly broth without chunks of anything, I decided to stop buying canned chicken noodle soup and make my own. 

This chunky chicken noodle with vegetable soup is a light one-pot dinner. Start with cheese and crackers, and add grainy bread and a salad. Heck, make Emeril's Bloody Marys (recipe👇) to drink, or sip a glass of wine while preparing the soup. Enjoy!
 

You may also enjoy:

Friday, October 21, 2022

Beer Can Chicken

Photo - istock by Getty

I haven't thought of making Beer Can Chicken in years. My mother is European, and this is definitely Americana home cooking. What I like about this dish is its rub, a lot of it! A tasty and easy dinner to make over the weekend.

Beer Can Chicken

Ingredients For the Rub

2 tablespoons smoked paprika
Photo: allrecipes
2 tablespoons dry mustard
2 tablespoons basil
2 tablespoons garlic powder
2 tablespoons onion powder
2 tablespoons salt
1 tablespoon ground coriander
1 tablespoon ground cumin
1 tablespoon black pepper
1 teaspoon cayenne pepper

Ingredients for the Basting Spray

1/2 can of the beer
2 cups apple cider
2 tablespoons balsamic vinegar (or whatever vinegar you have)

4 - 5 pound chicken
1 tablespoon olive oil (or butter)
remaining half of beer (and can)

Directions:

1) In a bowl, mix the dry herbs and spices to make the rub.

2) Rub the raw chicken with olive oil (or butter) and then rub the chicken inside and out with the dry spice mixture. Or you can wet the dry rub with beer and smear the mixture all over and inside the chicken as this works too.

3) Pour half the can of beer into a spray bottle with the apple cider and vinegar.

4) Leave about half the beer in the can and insert the can into the cavity of the chicken with the chicken resting on the can.

5) Suburbanites can cook the chicken for 2 hours over a medium hot grill (350 degrees) under a grill cover. City coop dwellers can bake it in the oven for 2 hours resting the can with chicken on a baking pan. The beer keeps the chicken moist, as well as, adds flavor. While cooking you can spritz the chicken with the basting sauce every half hour to give it additional flavor. The sauce adds a hint of sweetness without sugar.

6) The chicken is done when it's golden and crispy on the outside and tender and juicy on the inside. Be careful removing it from the grill or oven and lifting the chicken off a very hot tin can onto a serving dish. Wait at least 10 minutes after removal from the heat before cutting.

Enjoy the weekend! Bon Appetit!


You may also enjoy:

Saturday, March 26, 2022

America's Test Kitchen's Poulet au Vinaigre

All photos: America's Test Kitchen and the video footage is linked below.

Today I'm sharing a chicken in vinegar dish featured on America's Test Kitchen, watch here. It originated in Lyon, France. As someone with German ancestry, I can appreciate food with vinegar as a flavor. Delish!

A fancy French name to Anglo ears for a simple and scrumptious one-pan recipe, and readers, you know how I love to prepare healthy, real food in a single pan, i.e., no-fuss dinners as there's less to clean up after you finish! Here's the tasty recipe in written form -- you're welcome!

Poulet au Vinaigre a/k/a Chicken in Vinegar

Ingredients:

8 chicken thighs - trimmed and dried with a paper towel, but leave the skin on the back of the chicken
1 1/4 teaspoons salt
3/4 teaspoon pepper
1 tablespoon vegetable oil
1 shallot, minced
2 peeled garlic cloves, diced
1 cup chicken broth
1 cup white wine
1/3 cup red wine vinegar
🍴🍽🍷
1 teaspoon of tomato paste
2 tablespoons butter
1 tablespoon tarragon
1 extra tablespoon red wine vinegar

Directions:

1) Salt and pepper the chicken thighs on both sides.

2) Heat 1 tablespoon of vegetable oil in a 12-inch skillet. 

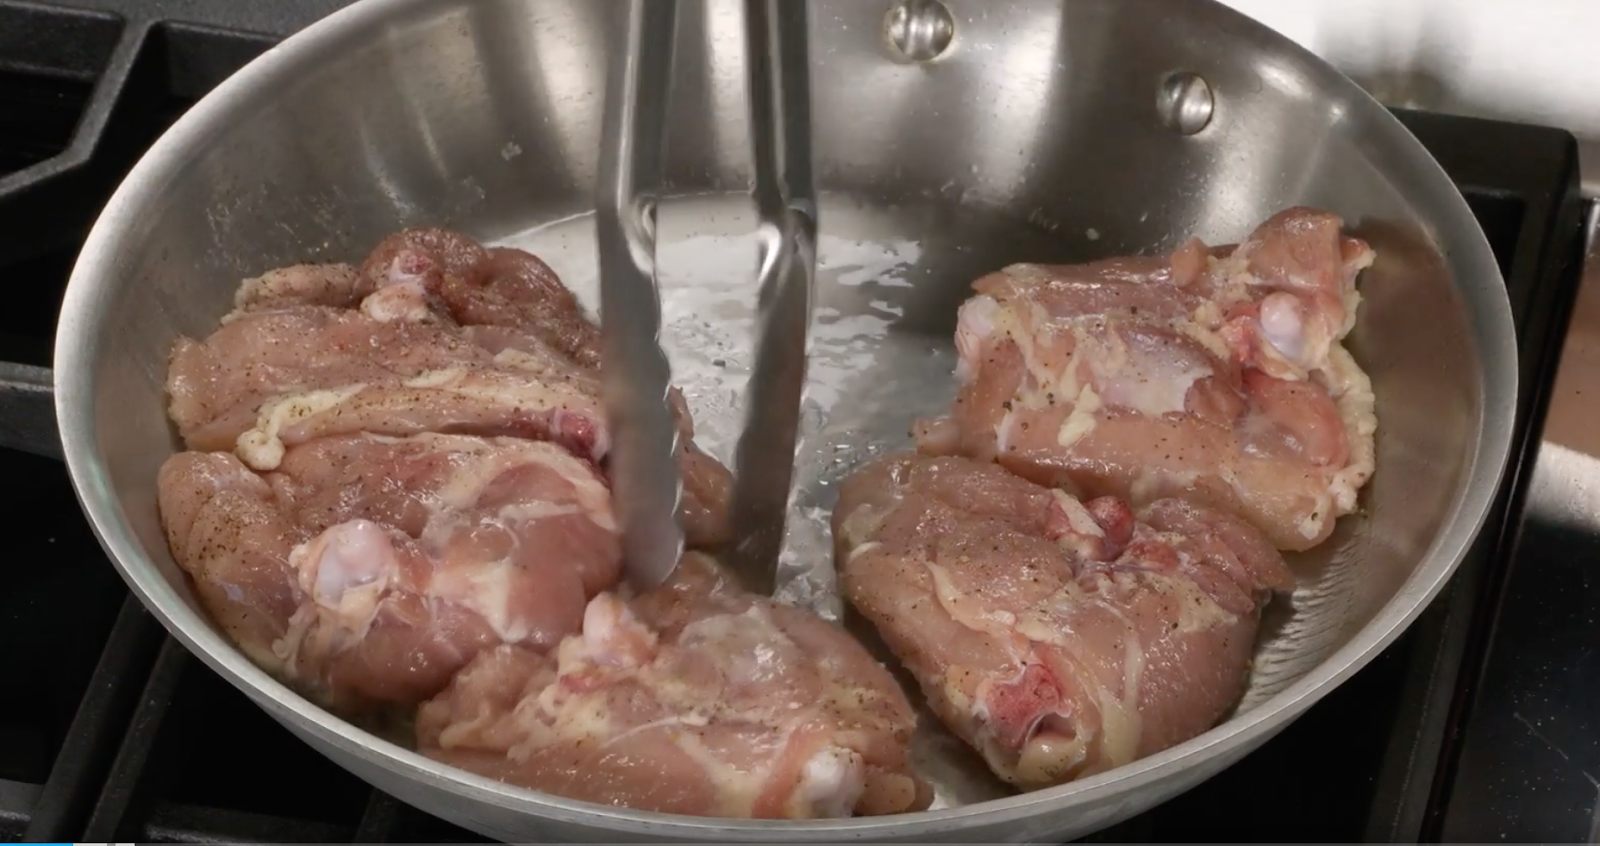
3) Lay the thighs in the hot oil and brown them.

4) Add the sliced garlic. Sear the chicken for 8 minutes.

5) Turn the chicken over and cook the other side for 3 minutes. They will be crispy, but not fully cooked at this stage.

6) Remove the seared chicken from the pan and transfer it onto a plate. From the frying pan and into a separate bowl, pour off all but two tablespoons of the chicken fat.

7) Next add the minced shallots to the remaining two tablespoons of chicken fat, stir and cook with the brown chicken bits left in the pan.

8) Pour in one cup of chicken stock.

9) Add a cup of white wine followed by a 1/3 of a cup of red wine vinegar.

10) Return the chicken thighs to the pan and liquid - the crispy skin side up.
11) Next slide the pan into a heated 325 degree F oven and bake for 35 - 40 minutes. Make sure the temperature of the chicken reaches 195 degrees on a meat thermometer.

12) Remove the chicken and place the pieces on a plate.

13) To finish the sauce that's left in the frying pan, bring it to a simmer, then add a teaspoon of tomato paste, two tablespoons of butter, a tablespoon of minced tarragon, and an additional tablespoon of red wine vinegar. Whisk the gravy until it thickens.


14) Pour the sauce around the chicken on a plate or serving dish, then tilt the plate to 
distribute the sauce everywhere and under the chicken.


Serve each hungry diner 2 thighs. 
Eating this dinner at home costs pennies compared to ordering it in a restaurant.
 
As regular readers know, recipes end up on THE SAVVY SHOPPER so I, myself, can return here to make them again. The blog serves as our electronic recipe box. 

In this recipe, you can substitute chicken breasts if you wish. Although in general, I prefer white meat to dark, professional chefs tend to say chicken thighs are the juiciest, most flavorful parts of a chicken, therefore I use thighs in this dish. Try it the first time and note: Test Kitchen mentions in France, a mix of chicken parts goes into the dish, but using all thighs in lieu of a mix of different chicken parts ensures the chicken cooks uniformly. What I love about America's Test Kitchen recipes is they try making dishes several ways before settling on the best ingredients and methods for the dish for us, its viewers. Bon Appetite!
Here's an extra photo too delectable to not post. It's of step 12, getting ready to pull the chicken out and plating it, to finish the sauce.


You may also enjoy:

Monday, August 10, 2020

Stove Top Roast Chicken With Gravy

The next step was to thicken the water and pan dripping into a gravy.

So. Have you ever decided it was too hot outside to turn on your oven? Me too! The problem is last week I decided this after impulsively buying a whole raw chicken at the supermarket. Among the things in life I have never learned how to do is cut up a chicken carcass. Don't know how and have no desire to learn, to be honest! That's why if you ever eat a chicken dinner in my home which I've cooked, it's always oven-roasted chicken. 

Can you roast a chicken on the stovetop? I was about to find out! As it turns out ... absolutely! Here's how:

Ingredients:     
                                                 
1 raw chicken (Mine was nearly 4 pounds)
2 stalks celery, diced
1 small onion, diced
2 cups water
2 - 3 large carrots
2 - 3 medium potatoes
1 large chicken bouillon cube
Spices to taste: I used garlic, Zatarian's Creole Seasoning, rosemary, bay leaf, Herbes de Provence
1 tablespoon flour per cup of water to make the gravy.

Directions:

1) Take out a large stockpot. I use an all-purpose nonstick steel Wok pan. Toss in the bird (add a pad of butter, or a little olive oil if your stockpot is not nonstick). On medium-low heat, brown the chicken on both sides. It takes about 5 minutes.

2) Next toss in the diced celery and onions for a few minutes to grill them. 

3) Add the water, carrots and potatoes, as well as, bouillon and seasonings to taste.

4) Put a lid on the pot and simmer the chicken on medium-low heat for 1 - 1 1/2 hours.

5) After 20 minutes, the carrots and potatoes should be tender, so remove them from the pot and let the chicken continue to cook. You should be able to smell and see when the chicken is done. When it is, gently (so it doesn't fall apart) remove it also.

6) I let the pan drippings (water, cooked celery, onions, and seasonings) cool a bit before whisking 2 tablespoons of flour dissolved into some water into them. Simmer for another 5 minutes, or so to thicken into gravy.

Presto, dinner is ready. One-pan summer meals rock!

In the fall and winter, you can use the recipe to roast a chicken INSIDE your oven ... and can eliminate browning the bird first. In the oven, remove the top off of your roasting pan to brown the chicken as the final step.  On a stovetop, brown the chicken first.

How it all began:


You may also enjoy:
Let's Plan A Wine Party
Shelf Helpers To Organize       
7 Kitchen Tools Worth Your Money
5 Kitchen Tools I Will Never Buy Again

Thursday, January 9, 2020

Chicken Fried Dishes Using My Breadcrumbs

Chicken Fried Steak at Cracker Barrel
It's not that I don't enjoy cooking or eating, but we must do it every day! The rigmarole of buying food; putting it away; cooking; and the cleanup is time consuming. If we didn't have to eat, we'd save a heap of time each week. How would you spend it? 

Furthermore, I get tired of my own cooking! That's why I try and post new recipes on THE SAVVY SHOPPER. Like you, I can return here, myself, to see how to make them again.😁

My latest dinners are pan fried Chicken Breasts Thin Sliced and Chicken Fried Steak -- fast, delicious and easy to make, therefore worth sharing! (I won't lie, sometimes what the supermarket puts on sale inspires my week of dinners. To switch up your diet, it's as good of a system of meal planning as any other.😄🤣)

Before we start, let's make the "breadcrumbs" --

Debra's Breadcrumbs

Ingredients: 

1.5 cups of uncooked oatmeal
spices to taste. I use: Zataratin's Creole Seasoning; dried garlic, oregano, turns of the black pepper mill, parsley, rosemary, thyme, a dash of the nutmeg.

Directions:

Pulse together in a food processor.

Dump into a shallow dish to coat your meats. Feel free to use real breadcrumbs if you buy them. I don't because I'm lazy. I don't want another food item to restock, and that's the reason I started making my own ''breadcrumbs" with uncooked oatmeal, and hey, it works! (If you are one step lazier than me, you can simply season all-purpose flour as meat coating. Still edible, it works too.)

Here is how I use my oatmeal breadcrumbs:

Pan Fried Chicken Breast, Thin Sliced

Ingredients: 

3 - 4 thin chicken slices per person
spicy brown mustard
extra virgin olive oil
butter
Breadcrumbs
Photo of Chicken breast: Food Network

Directions:

1) Brush your frying pan with a coating of olive oil and a couple pads of butter. The butter is for flavor. Only a coating of oil is needed to "fry" food. I usually turn the heat on low while I prepare the chicken, then turn the heat up to let it get hot before dropping the breaded chicken slices into the pan.

2) Rub the mustard on both sides of the thin raw chicken slices; dip both sides in the breadcrumbs and lay them in a hot frying pan to brown.

3) I reduce the heat to medium, put a lid on the chicken and cook it for 3 - 5 minutes on both sides. When the chicken turns from pink to white, it's done. (While you could bake this dish in the oven, I don't since the chicken cooks in minutes on a stove top.) 

+++++++++++++++++++++++

Ground beef was also on sale at my supermarket leading to the 2nd recipe:

Chicken Fried Steak (Using Ground Beef)
Photo of chicken fried steak: Taste of Home

Ingredients:

For the "steak" --
1 lb lean ground beef
1 tablespoon Worcestershire sauce
a dash of Creole seasoning (or just salt and pepper, your choice)
1 scrambled egg
My breadcrumbs

For the gravy --
2 - 3 tablespoons of pan drippings and all the brown ground beef bits 
2 tablespoons flour
1 1/2 cups milk
1 small beef or chicken bouillon
12 turns of the black pepper mill
a dash of dried celery
a dash of dried garlic

Directions for the "steak:"

1) Combine the ground beef with Worcestershire sauce and season to taste. Form into patties.

2) Triple dip into the egg and my breadcrumbs. Shake off the excess each time before dipping again -- this will make it stick and not drop off creating bare spots while frying.

3) Lay in a hot pan brushed with olive oil. You don't need to deep fry the "steaks," just use enough olive oil to coat the pan.

4) I cover my pan with a lid and let it cook on medium heat, flipping the patties over when the first side is golden brown. Repeat on the side  side.

Directions to make the gravy:

1) Cook 2 tablespoons of all purpose flour, whisking it into the pan drippings and ground beef bits. Cook for a couple of minutes and continue stirring.

Image result for pepper"2) Add the milk and seasonings and stir the mixture until it thickens. 

Often tenderized cubed beef is used to make chicken fried steak, but lean ground beef is easy to buy, make and works. Convenience rules!

The origin of chicken fried steak is sometimes attributed to the Texas town of Lamesa, brought over by German immigrants who modified the recipe from wiener schnitzel. Although interchangeable in many restaurants with country fried steak, traditional chicken fried steak is crispy and served with a milk peppery gravy, while traditional country fried steak soaks in a pan of brown gravy and onions. Regionally, this isn't always followed. Country fried steak is sometimes also served with a milk peppery gravy. The dishes have a slight variation [i.e., more crispy with milk gravy vs. soaked in brown gravy with onions ... but often a milk gravy too] using nearly the same ingredients. Enjoy your fast, stick-to-your ribs and yet still healthy dinner!
Country fried steak at Cracker Barrel


You may also enjoy:
German Rice Pudding
Skillet Chili Con Carne
A Black And White-Speckled Classic
THE SAVVY SHOPPER'S Seven Healthy Swaps

Wednesday, September 6, 2017

Turning Leftover Chicken Into A Casserole

The food stylist took the day off, so this didn't make the center of the plate. Oh that's right, THE SAVVY SHOPPER doesn't have a food stylist. (Plus, my phone takes yellow pictures, which is why this is a writing, not a photo blog.) Fortunately the casserole tastes the same. Delicious.😊 
My supermarkets run sales on roast chicken so often, I rarely bake a chicken anymore. The price of a whole chicken (whether raw or a roast) is about the same; therefore, I let Key Food, or C-town do the work. I come home with hot roast chicken ready to eat!

Leftovers are turned into chicken salad, or sandwiches. Last night I turned the leftovers into a chicken casserole. It was my first time making a casserole of any kind; and it was tasty. I used ingredients in the refrigerator that had to go! So feel free to vary the vegetables. Look to my recipe below as a guide. (I doubt I will use avocado the next time I make the dish, if the avocado is fresh and soft to eat with salsa. I had an avocado, which never ripened, so I decided to bake it in my casserole.) If you don't have leftover chicken, you can grill 2-3 chicken breasts in a pan before you start:

Chicken and Quinoa Casserole

Ingredients:

1 cup dried quinoa (Any grain [rice, millet, etc.] can be substituted.)
1/2 water
leftover whole chicken (or 2-3 chicken breasts), cooked and cubed
16 ounce package frozen broccoli florets
5-6 garlic cloves, minced
1/2 red bell pepper, cubed
3 carrots, sliced thin
2 cups milk
2 large chicken bouillon cubes (or 4 small)
1/2 cup flour
1 cup sharp cheddar cheese
1/4 Parmesan cheese
cooking spray, or olive oil (I use the olive oil.)

Optional: avocado, cubed

Spices to taste: I use salt (taste test first, since some brands of bouillon have plenty of salt), black pepper, red pepper flakes; dried celery powder, dried garlic powder, dried onion powder, rosemary, basil, Herbes de Provence, a few turns of a nutmeg mill and Worcestershire sauce.

Directions:

1) Brush you casserole pan with olive oil (or use cooking spray). Spread the quinoa on the bottom of the pan, and pour about 1/2 cup of water on top of it to soak up. Let the uncooked quinoa absorb the water while you prepare the other ingredients. The water will enable the quinoa to cook during baking. If left dry, it will not get tender. (Some cooks raise quinoa, instead, but I can't be bothered.😏)

2) Next layer with the cubed chicken, broccoli florets, minced garlic, and the vegetables you are using. Season to taste.

3) Make a white sauce in a sauce pan on your stove top by
combining 2 cups of milk with 1/2 cup of flour and the chicken bouillon cubes. Whisk while the mixture heats, then simmers over a medium flame. It will thicken in about 5 minutes. Taste and add salt and pepper as needed. After the white sauce thickens, pour it over the chicken, spices and vegetables.

4) Top with sliced, or shredded sharp cheddar cheese; and sprinkle on the Parmesan cheese. I like the green of dried parsley sprinkled on top as a last step.

5) Bake in the oven at 350 F degrees for about 40 minutes.

I love one pot meals! A mesh-mash of healthy and cheesy ingredients that stick to the ribs with an easy-breezy clean up of one pan. Heck yeah! Grab a fork. Bon appétit, friends!


You may also enjoy:
TIME'S Person Of The Year    
The Sample Sales Of New York City    
9 Ways To Save Money At the Supermarket
The SAVVY SHOPPER Turns 8 Years Old Today