Showing posts with label America's Test Kitchen. Show all posts

Thursday, January 5, 2023

Useful: Bigger Bolder Bakers' Substitute Corn Syrup & Molasses

PhoPhoto: Bigger Bolder Baker

There are two baking ingredients I never have in my pantry because I rarely need them. With these substitute recipes, I may never have to buy them. Thanks to Gemma Stafford, a former chef, I can make them at home (with ingredients I always have) for when I get a notion to bake a pastry that calls for one or the other. I love Gemma's recipes, tips, and videos but her website has so many ads and popups it's slowwww to load and murder to scroll, therefore although I'll link her website here I'm reluctant to send readers over there to be frustrated, so I'm reposting her 2 substitute recipes below also:

 I) Substitute Corn Syrup

Ingredients:

2 cups (16oz/450g) sugar
3/4 cup (6floz/170ml) water
1/4 teaspoon cream of tartar (there is no substitute for this)
2 teaspoons lemon juice (stops sugar from clumping)
a pinch of salt

Directions:

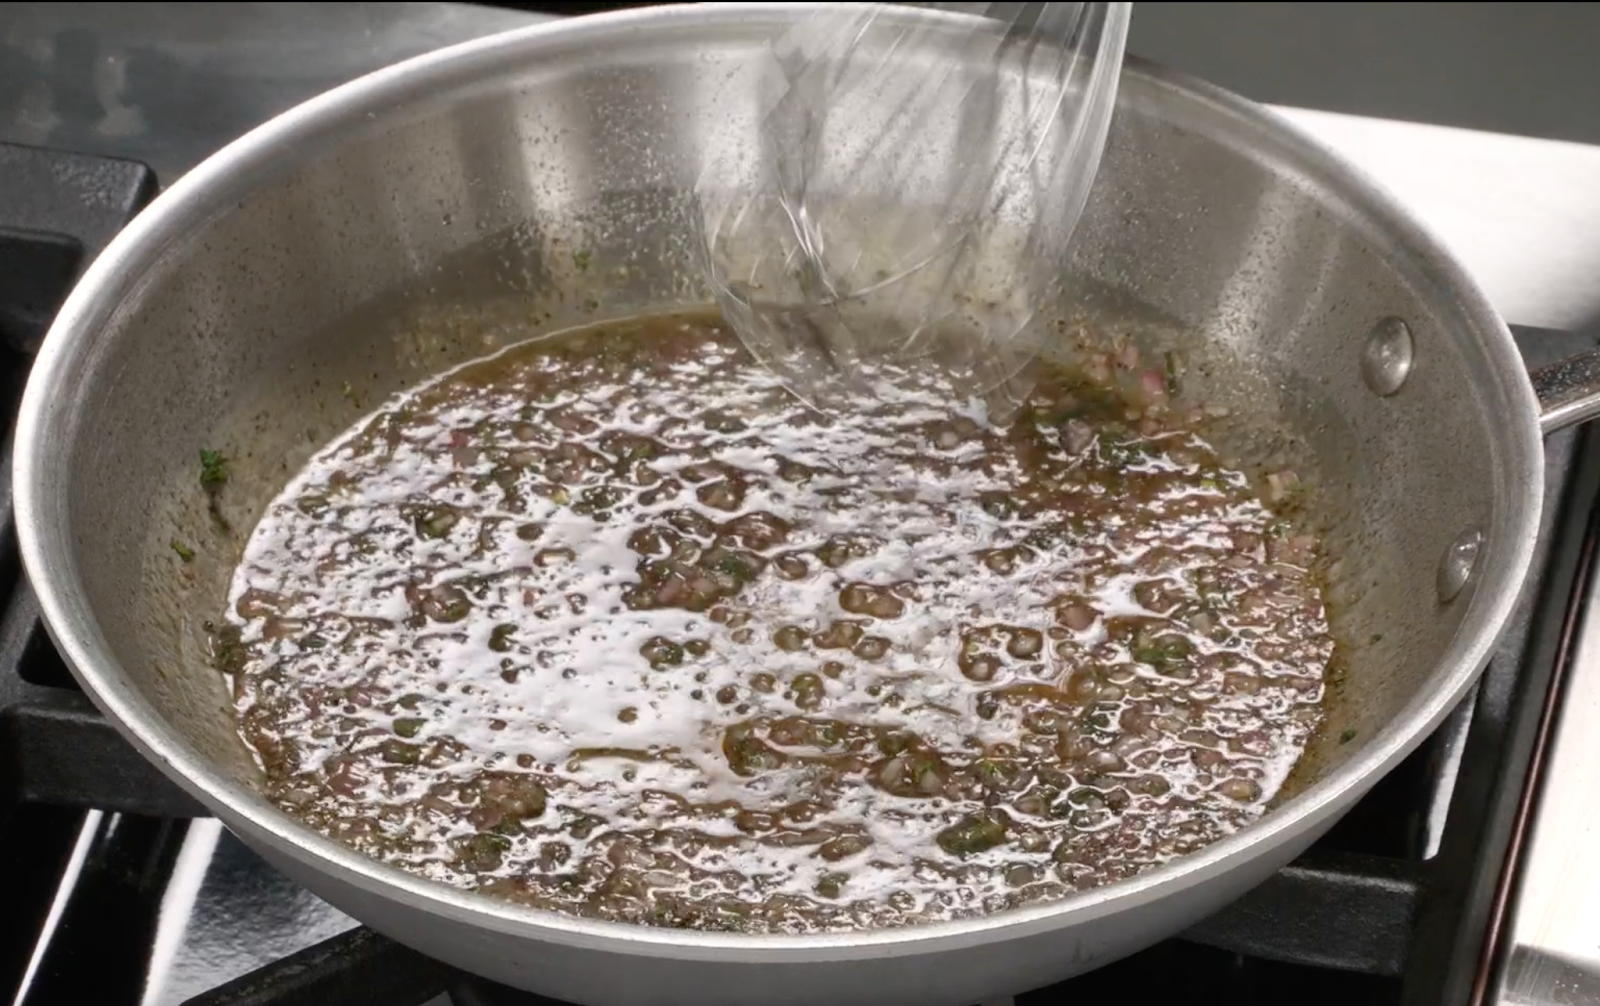
1) Toss the sugar, water, cream of tartar, lemon juice, and salt into a heavy saucepan.

2) Bring to a medium boil, stir until the sugar dissolves, then turn down the heat to a gentle boil and simmer for 15 to 20 minutes until the mixture reduces quite a bit. Once cooled the syrup thickens. 

Photo: Bigger Bolder Bakers

II) Substitute Molasses

Ingredients:

2 cups (16oz/450g) dark brown sugar
3/4 cups (6floz/170ml) water
1/4 teaspoon cream of tartar
2 teaspoons lemon juice freshly squeezed

Directions:

1) In a heavy saucepan over medium heat, add the dark brown sugar, water, cream of tartar, and lemon juice. Stir to dissolve the sugar.

2) Once the sugar dissolves, reduce the heat and simmer for 4 - 5 minutes until the mixture thickens. Cool and store in a sealed glass jar.

Gemma is an excellent baker and teacher and you should check out her how-to YouTube videos, but oi vay that website!

*****************************************************************************

So now let's bake something!

All blondie photos and recipe courtesy of ATK

Let's use our homemade corn syrup to make America's Test Kitchen's Brown Butter Blondies -- linked here -- another website with inconveniences that you can overcome by watching its videos on Youtube.

Ingredients:

2 1/4 cups all-purpose flour
1 1/4 teaspoons table salt
1/2 teaspoon baking powder
12 tablespoons unsalted butter
1 3/4 cups packed light brown sugar
3 large eggs
1/2 cup corn syrup
2 tablespoons vanilla extract
1 cup pecans, oven-toasted and chopped coarsely
1/2 cup milk chocolate chips
1/4 - 1/2 teaspoon flake sea salt, crumbled

Prepare a 13 x 9-inch baking pan with 2 sheets of aluminum foil with flaps (and crisscrossed +) so that you can lift the blondies up out of the pan after they are baked. Make sure you press the foil into the 4 corners of the pan and grease or use cooking spray on the foil.

Directions:

1) In a mixing bowl, whisk together the dry ingredients: flour, salt, and baking powder.

2) Melt the butter in a 10-inch skillet. Over medium heat, simmer the butter, whisking throughout until it's golden brown and has a nutty aroma, which gives the blondies a butterscotch flavor. Transfer to a large heat-proof mixing bowl.

3) Add the sugar to the hot butter and whisk. 

4) Next add the eggs, corn syrup, and vanilla. Whisk until smooth.

5) Stir in the flour mixture until fluffy. Test Kitchen uses a spatula to incorporate the ingredients.

6) Stir in the pecans and chocolate chips.

7) Spread evenly into the prepared baking pan and sprinkle to top with the flaked sea salt.

8) Bake in a preheated 350 degrees F oven for 35 - 40 minutes (turning the pan around at 20 minutes) until golden brown and the cake springs back to the touch.

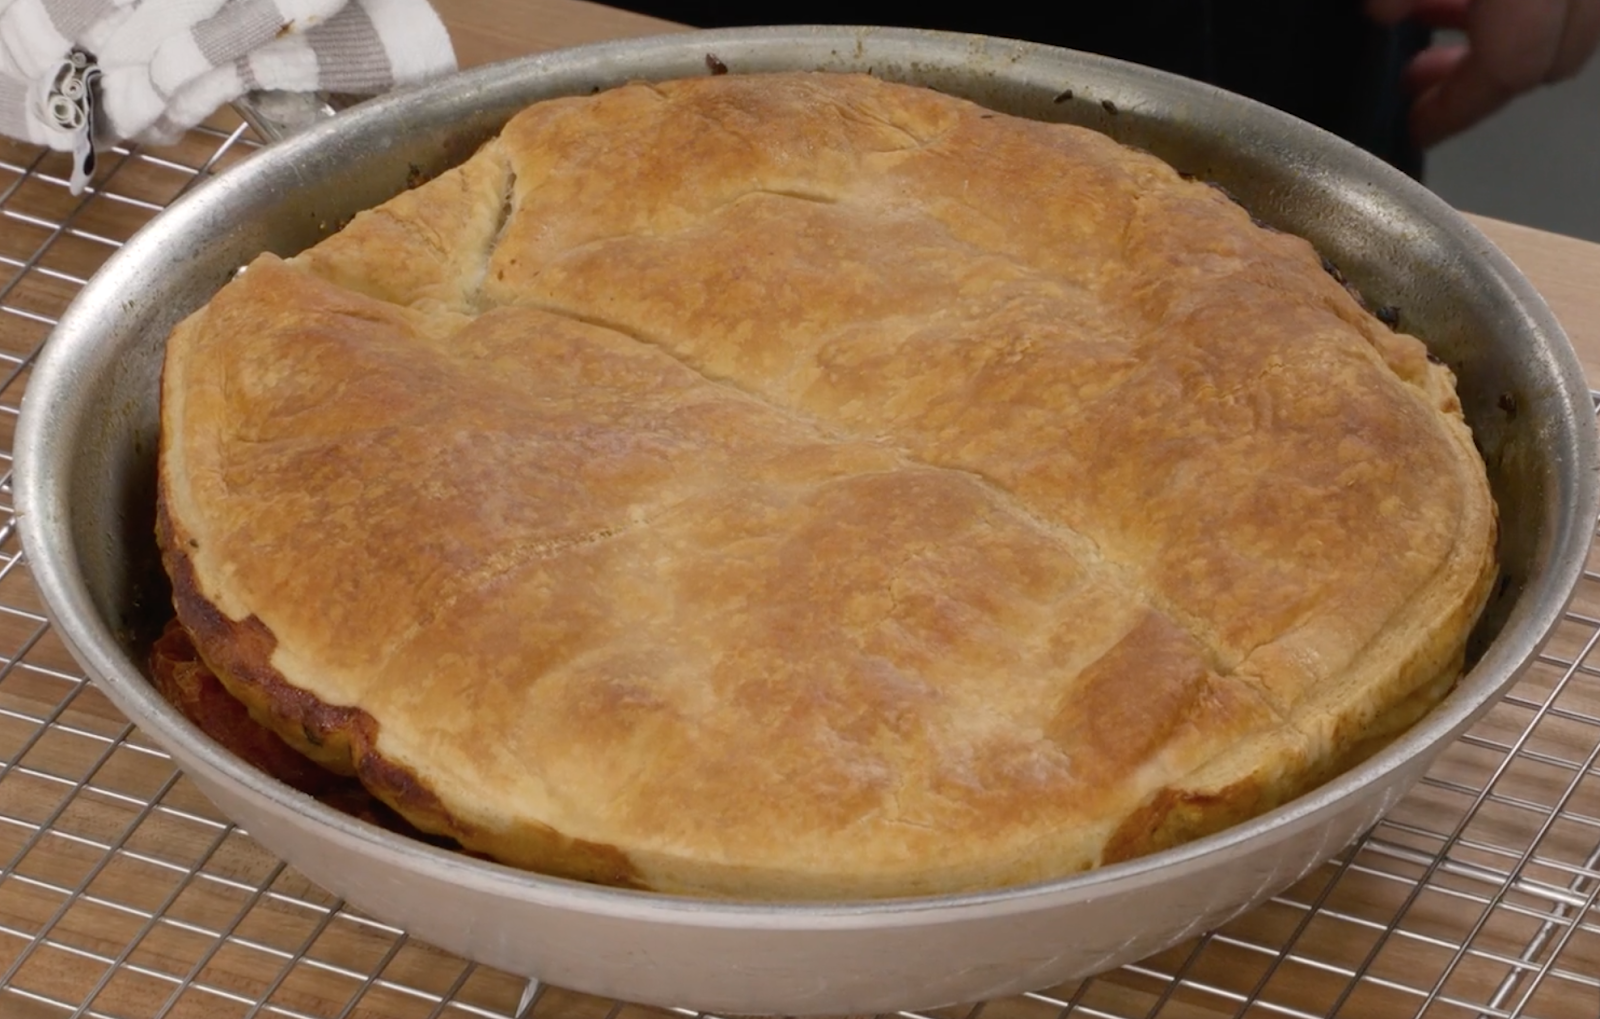
9) Let the blondies cool completely in the pan before lifting the foil with the pastry out of the pan and onto a cutting board. Makes 24 bars.

Sometimes it takes a professional baker to perfect a substitution that works in our recipes. Thank you, Gemma Stafford (and Test Kitchen for the best blondies). Who wants to run to the supermarket every time you turn around, not to mention, stock 2 ingredients you rarely use! Now there's no need to do either.

You may also enjoy:

Tuesday, July 19, 2022

America's Test Kitchen's Upside-Down Plum Tomato Tart

All photos courtesy of Test Kitchen -The lovely hands of Test Kitchen Cook Elle Simone 

America's Test Kitchen has perfected yet another delicious recipe and since they publish it for free, I feel I can share it with my readers, and I also link it back to the episode. My role is to give you (myself included!) a cheat sheet, namely, the written ingredients and directions, and a place to return to make it whenever you like. This savory tomato tart recipe mimics the same method used to make apple tarts, and it turns out that once upon a time tomatoes were called love apples.🍎🍏🍅 Watch the episode and see the recipe below:

Upside Down Tomato Tart

Ingredients:

2 lbs plum tomatoes, cut in half with seeds and juice removed
1/3 cup sherry vinegar
 2 1/2 tablespoons sugar
1/2 teaspoon salt
1/4 teaspoon pepper
1 medium shallot, finely diced
1 tablespoon butter
2 teaspoons thyme, minced
Extra 1/4 teaspoon each of salt and pepper
1 store-bought puff pastry or make the tart dough yourself from this recipe.

Directions:

1) Into a 10-inch skillet pour the sherry vinegar, sugar, salt, and pepper. Bring to a simmer and cook for about 2 minutes, swirling the pan to dissolve the sugar. 

2) Once the liquid is reduced to resemble caramelized syrup, add the shallot, butter, and thyme.


3) Next turn the heat off and add the prepared tomatoes. Distribute them evenly in the pan and coat the tamhatoes with the caramelized vinegar mixture. Finish off with a sprinkle of salt and pepper. 🍽

4) Bake in the oven at 400 degrees F for 1 hour.

5) Take your tart pastry dough out and on a floured surface roll it out 10 inches. Use a 10" plate as a measure to cut a 10" circle of dough. Chill the dough in the refrigerator while the tomatoes are baking in the oven.

6) After 1 hour, remove the roasted tomatoes and cover the skillet evenly with the chilled tart dough. Press the dough in at the edges of the skillet.

7) Return to the oven and bake for 15 minutes, then turn the skillet around to bake for another 15 minutes. After 30 minutes, the dough should turn golden brown.

8) Remove from the oven, and wait about 8 minutes before topping with an inverted 10-inch plate over the tart sitting inside the skillet. Quickly flip the plate and skillet over so the tomato side of the tart is face up.

9) Wait another 10 minutes for the tart to cool ... the toughest part of all as you smell the tomato tart aroma!

Sprinkle with more dried thyme. Cut into slices, serve and enjoy! 


We gratefully thank Test Kitchen Cook Elle Simone for perfecting this luscious and savory tomato tart recipe, always the best of the best, since as stated in the show's name, it's tested (and perfected!) for all of us to make at home!

This piece has my name on it. Where are my bite marks?


You may also enjoy:

Saturday, March 26, 2022

America's Test Kitchen's Poulet au Vinaigre

All photos: America's Test Kitchen and the video footage is linked below.

Today I'm sharing a chicken in vinegar dish featured on America's Test Kitchen, watch here. It originated in Lyon, France. As someone with German ancestry, I can appreciate food with vinegar as a flavor. Delish!

A fancy French name to Anglo ears for a simple and scrumptious one-pan recipe, and readers, you know how I love to prepare healthy, real food in a single pan, i.e., no-fuss dinners as there's less to clean up after you finish! Here's the tasty recipe in written form -- you're welcome!

Poulet au Vinaigre a/k/a Chicken in Vinegar

Ingredients:

8 chicken thighs - trimmed and dried with a paper towel, but leave the skin on the back of the chicken
1 1/4 teaspoons salt
3/4 teaspoon pepper
1 tablespoon vegetable oil
1 shallot, minced
2 peeled garlic cloves, diced
1 cup chicken broth
1 cup white wine
1/3 cup red wine vinegar
🍴🍽🍷
1 teaspoon of tomato paste
2 tablespoons butter
1 tablespoon tarragon
1 extra tablespoon red wine vinegar

Directions:

1) Salt and pepper the chicken thighs on both sides.

2) Heat 1 tablespoon of vegetable oil in a 12-inch skillet. 

3) Lay the thighs in the hot oil and brown them.

4) Add the sliced garlic. Sear the chicken for 8 minutes.

5) Turn the chicken over and cook the other side for 3 minutes. They will be crispy, but not fully cooked at this stage.

6) Remove the seared chicken from the pan and transfer it onto a plate. From the frying pan and into a separate bowl, pour off all but two tablespoons of the chicken fat.

7) Next add the minced shallots to the remaining two tablespoons of chicken fat, stir and cook with the brown chicken bits left in the pan.

8) Pour in one cup of chicken stock.

9) Add a cup of white wine followed by a 1/3 of a cup of red wine vinegar.

10) Return the chicken thighs to the pan and liquid - the crispy skin side up.
11) Next slide the pan into a heated 325 degree F oven and bake for 35 - 40 minutes. Make sure the temperature of the chicken reaches 195 degrees on a meat thermometer.

12) Remove the chicken and place the pieces on a plate.

13) To finish the sauce that's left in the frying pan, bring it to a simmer, then add a teaspoon of tomato paste, two tablespoons of butter, a tablespoon of minced tarragon, and an additional tablespoon of red wine vinegar. Whisk the gravy until it thickens.


14) Pour the sauce around the chicken on a plate or serving dish, then tilt the plate to 
distribute the sauce everywhere and under the chicken.


Serve each hungry diner 2 thighs. 
Eating this dinner at home costs pennies compared to ordering it in a restaurant.
 
As regular readers know, recipes end up on THE SAVVY SHOPPER so I, myself, can return here to make them again. The blog serves as our electronic recipe box. 

In this recipe, you can substitute chicken breasts if you wish. Although in general, I prefer white meat to dark, professional chefs tend to say chicken thighs are the juiciest, most flavorful parts of a chicken, therefore I use thighs in this dish. Try it the first time and note: Test Kitchen mentions in France, a mix of chicken parts goes into the dish, but using all thighs in lieu of a mix of different chicken parts ensures the chicken cooks uniformly. What I love about America's Test Kitchen recipes is they try making dishes several ways before settling on the best ingredients and methods for the dish for us, its viewers. Bon Appetite!
Here's an extra photo too delectable to not post. It's of step 12, getting ready to pull the chicken out and plating it, to finish the sauce.


You may also enjoy:

Tuesday, September 28, 2021

Test Kitchen's Easier Ever Drop Biscuits

All photos courtesy of Test Kitchen

Since America's Test Kitchen uploaded its video on YouTube, I'm bringing it here for you, my readers. Thank you, TK for making the recipe publicly available for all of us to make! 

The drop biscuit recipe uses cream instead of butter and buttermilk, and this allows us to break a cardinal rule in biscuit making which is keeping ingredients ice cold. It also eliminates the steps of rolling out and cutting the dough into biscuits.

Test Kitchen's Easier Ever Drop Biscuits

Ingredients:

Dry:
3 cups all-purpose flour
4 teaspoons sugar (it browns yet will not noticeably sweeten the biscuits)
1 tablespoon baking powder
1/4 teaspoon baking soda (for flavor and browning)
1 1/4 teaspoons salt
Wet:
1 cup cream 

Directions:

1) Toss the dry ingredients into a mixing bowl and whisk them together.

2) Heat the cream in a microwave to 95 - 100 degrees F. Takes 60 - 90 seconds. You can't omit this step as it melts the butterfat in the cream thinning it to get the right consistency to make a dropable dough. If you leave the cream cold as you would to make the perfect classic biscuits, the batter will be too dry and then if you add more cream to combine into a dough, the butterfat will melt while baking in the oven, turning the drop biscuits into pancakes.

3) Combine the heated cream into the dry ingredients and don't be afraid to mix well. The high-fat content in the cream will keep the dough from forming too much gluten. Another rule you can break with this recipe is not touching the biscuit dough too much.

Now we come to the easy part!

4) Spray a 1/3 measuring cup with cooking spray, scoop up the dough and drop onto a parchment paper-lined baking sheet. Repeat for 10 biscuits. With your hand feel free to get in there to pretty up your biscuits.

5) Bake in a 450 degree F preheated oven for 10 - 12 minutes. Rotate the tray halfway through the baking. When golden brown and done in the middle, remove from the oven. (see top image👆).

Test kitchen suggests melting 2 tablespoons of butter to brush on the top of each biscuit after you pull them out of the oven.

Eat the biscuits while they are warm. Enjoy!


You may also enjoy:

Thursday, August 19, 2021

Test Kitchen's Cast Iron Baked Ziti with Charred Tomatoes

All photos courtesy of America's Test Kitchen (Click ATK to watch.)

America's Test Kitchen, the television show, shared this recipe as a non-subscription freebie. It's a one-cast-iron-skillet dinner that promises to be as delicious as the more complicated, multi-pots-and-pans method of making baked ziti. The only other kitchen tools you'll need are a cutting board and a sharp knife. 
As usual, I like to post a winning recipe on THE SAVVY SHOPPER so I, too, can return here to make it again.

Food takes a big bite out of a budget, yet knowing how to cook ensures you eat healthy and delicious meals without a struggle. Now let's get cooking ...

Cast Iron Baked Ziti with Charred Tomatoes

Ingredients:

1 1/2 lbs grape tomatoes
1 teaspoon extra virgin olive oil
1 teaspoon salt
6 garlic cloves, minced
1 teaspoon tomato paste
1/4 teaspoon of red pepper flakes
12 oz of uncooked ziti
3 cups of water
1/2 cup parmesan cheese
4 oz of mozzarella cheese, grated
1/4 cup of fresh basil, chopped
Salt and pepper to taste

Directions:

1) Heat the tomatoes mixed with extra virgin olive oil and salt in a preheated 12 inch cast iron skillet and cook on medium-high for about 10 minutes, stirring periodically until the tomatoes are charred.

2) After the tomatoes are charred and start to break up, add the minced garlic, tomato paste, and red pepper flakes. Stir and cook for about 30 seconds more, or until you smell the garlic.

3) Turn off the heat and using a potato masher, mash the charred tomatoes into a sauce.

4) Next toss the uncooked ziti pasta into the skillet along with 3 cups of water.

5) Turn the heat back on high to bring it to a boil.

6) Reduce the heat and let the pasta cook under a lid, stirring often to prevent sticking until the noodles are al dente. This takes about 10 -12 minutes. Make sure the ziti cooks under the liquid to tenderize and watch as the liquid evaporates for consistency that is not too wet or too dry.

7) Next mix in the parmesan cheese and fresh chopped basil.  Also, salt and pepper to taste.

8) Top the dish with mozzarella cheese.

9) Finally place the cast-iron skillet into a preheated broiler setting in the oven. Stay with it by the stove. Let the cheese melt and brown, but watch carefully so neither the cheese nor pasta burns.

Cast iron skillets get blazing hot, and after pulling the ziti out of the oven, you'll have to wait for it to cool down. 

How I adore one-pan meals ... definitely, a keeper recipe, and an easy-peasy cleanup! The only tweak I made was to reduce the recipe by 1/3 so it fits into my 10 1/2 inch cast iron skillet. I also charred small plum tomatoes instead of grape tomatoes.
My Italian readers will cringe over a few substitutions: Although it is baked ziti, you could use curly noodles if it's what you have in the pantry or jarred tomato sauce in the winter. When I need a quick meal for just myself, I'm not above using #8 spaghetti noodles, and after plating it, melting the topped mozzarella in the microwave. [Yikes, did I just admit it? It is my way of making one tasty serving of pasta with no leftovers.] However, for guests make the dinner the Test Kitchen restaurant-worthy way. So easy and delicious. Enjoy!


You may also enjoy:

Friday, September 20, 2019

Pecan Cinnamon Coffee Cake Streusel

With fall arriving on the Western hemisphere, I began to crave a generous slice of coffee cake paired with a delicious, oversized cup of coffee on weekend mornings. But my rule is if I eat such treats, mostly I must make them myself. 

Otherwise I could balloon up to 300 pounds, and thus the reason for my rule: I can eat anything I want as long as I'm willing to make it myself! Make sense? Stops mindless eating. Homemade is often better ... and involves more time.

A browse of my blog's cakes and pastry recipes tells you I like sweets containing cinnamon and nuts. So America's Test Kitchen's Pecan Cinnamon Coffee Cake Streusel hits the cinnamon-nuts spot!  

Since you can watch the recipe being made for free online by registering, I think I can post the ingredients below, plus mention -- the (1) streusel topping and (2) cake batter are made separately blended in a food processor. It is necessary to mix the ingredients in the exact order listed with 4-5 pulses of a food processor. Do not over pulse, nor add ingredients out-of-order in this recipe, or what should be a light and fluffy coffee cake will form glutton resulting in a tough cake. And nobody wants to eat that!

America's Test Kitchen's Pecan Cinnamon Coffee Cake Streusel

Ingredients for the streusel topping:

Toss into a food processor --

1 cup of toasted pecans
1/3 cup brown sugar
🥮 Pulse 4-5 times in food processor
1/2 cup all purpose flour
3/4 teaspoon cinnamon
1/4 teaspoon salt
🥮 Pulse 4-5 times in food processor again. Set aside.

Ingredients for the cake batter:

Toss into a food processor --

1 2/3 cups all purpose flour
1 cup sugar
1 teaspoon cinnamon
teaspoon baking powder
1/2 teaspoon baking soda
3/4 teaspoon salt
🥮 Pulse 4-5 times in food processor
The spring form pan I own.

7 tablespoons of soften butter
🥮 Pulse 8-10 times in food processor

Directions:

1) Watch America's Test Kitchen's video as a thank you to them for creating the recipe for us!

2) After watching ATK, you can return here to my cheat sheet for the ingredients. I watched and jotted them down for you and me to return to time and again.:)

3) You will see how the bakers of America's Test Kitchen pour the cake batter into a 9'' spring form pan.

4) The topping is added from the outer edges first, followed by pouring it in the middle. That way the middle doesn't sink with streusel leaving uneven topping on the edges.

5) Bake at 350 degrees F for 55 - 60 minutes. Wait for the coffee cake to cool before you cut and eat it.

Undoubtedly, you can make the coffee cake with an electric mixer, but ATK made the job quicker with guaranteed light and fluffiness if you follow their directions exactly. 

You can watch AKT for other excellent recipes also!


You may also enjoy:
Plantinum Silicone Bags   
Maangchi's Homemade Kimchi
7 Kitchen Tools Worth Your Money
Most Daily Vitamins Are Worthless