Showing posts sorted by relevance for query recipes. Sort by date Show all posts

Sunday, December 23, 2018

Buckingham Palace Gingerbread Cookies


Photo: Royal/UK
There are Christmas cookies I make every year. Gingerbread cookies are not one of them. Often we bought Lebkuchen dipped in dark chocolate from a German bakery, so there was no need to make gingerbread cookies. Our confections tended to be cookies we could make better ourselves at home. But I do like to try new recipes. A British Facebook friend gave me this Christmas cookie recipe, and they are very simple to bake:

Buckingham Palace Gingerbread Cookies

Ingredients:

7/8 cup self raising flour (I will  substitute 7/8 cup of all-purpose flour, adding 1 1/2 teaspoons baking powder and 1/4 teaspoon salt because I do not buy self-rising flour.)
1 teaspoon ground ginger
1 teaspoon mixed spice (includes 
cinnamon, nutmeg, allspice)
Photo: McCormick

1/2 cup unsalted butter
2/3 cup soft dark brown sugar
2 tablespoon granulated sugar for dusting

3/8 cup milk (= 6 tablespoons)

Directions: 

1) Add the ingredients, one-by-one, to a mixing bowl and incorporate.

2) Chill the dough in the refrigerator for up to 1/2 hour.

3) With a rolling pin, roll out the dough flat. Eyeball it, not too thick or thin. 

4) With cookie cutters, cut your dough into shapes. Dusk with a little sugar.

5) Bake at 350 degrees F for 10-12 minutes. Let cool.

Royal Icing to decorate the cookies:
Wilton.com

Ingredients: 


2 pasteurized egg whites
1/2 teaspoon vanilla extract
2 cups powdered sugar

Optional: Food coloring of your choice; or leave the frosting white

Directions:

Mix and decorate your gingerbread cookies however you like. If you don't have a special icing tool, cut one corner off of a plastic sandwich bag to fill and squirt out the icing to decorate. The cookies that look like the work of a first grader, get eaten quickly!

What surprises me is, there is no call for an egg in the recipe, a fact I didn't know about gingerbread cookies.

As readers are aware, not only do I feature recipes in order to share them, but so I can return here to remember how to make them again!  Lately cooking and baking requires grabbing an iPad. Oh, what a digital age we live in!

For very busy people, Voorman is a small cookie company on the East coast. Their cookies are nearly as good as homemade and available at Rite-Aid and Target for about $3 for a 14 ounce bag. There is no shame in buying a bag!

Enjoy!


You may also enjoy:
Making Springerle
Scottish Shortbread
Czechoslovakian Cookies
Coconut Macaroons ... Delish

Thursday, June 25, 2020

Dry Nonfat Milk Is A Worthy Pantry Staple

Dry nonfat milk has many uses in cooking and baking, making it a good value. With a scoop, you can add protein to foods without having to adjust other ingredients as you would if using liquid milk. It's delicious added to a bowl of microwaved (1 minute, or 5 minute) Quaker oatmeal. I put dry powdered milk into bread and cake recipes. I also make Greek yogurt and smoothies with it. In addition, I buy a gallon of regular milk, but if I run out before I can get to the store, I use dry powdered milk in my coffee, or to drink. Naturally, fresh milk tastes better. But an ice-cold glass of reconstructed dry powdered milk is relatively good and tastes much better than having no milk to drink!

Some customers can find dry powdered milk cheaper than regular milk, not true in Manhattan, yet it is still a worthy staple to stock. Not sure why, but I have this unfounded fear of running out of milk. Dry nonfat milk never sours, and it keeps a long time.

From Walmart, I often order two 4 pound bags at once. During our pandemic, I was happy to have it in the pantry. Here are two recipes dry nonfat milk works well for:
I ate half warm before pouring it into a container to chill. Delish!

Rich Chocolate Pudding

Ingredients:

10 tablespoons instant nonfat milk
3 tablespoons cocoa powder
3 tablespoons all-purpose flour
Up to 1/4 cup of sugar (I try to reduce sugar when possible.)
2 cups of water
1 teaspoon of vanilla extract

Directions:

1) Whisk all the ingredients together in a saucepan cold.

2) Turn on the heat on the stovetop and whisk continuously until it boils.

3) Whisk while the mixture simmers and thickens. This takes 4 - 5 minutes of simmering.

4) Pour into dessert dishes and refrigerate.

Creamy Whipped Topping

Ingredients:

1/3 cup ice-cold water
1/2 cup of nonfat dry milk
1/2 teaspoon vanilla extract
3 tablespoons lemon juice
1/4 cup sugar

Directions:

1) Pour ice-cold water in a mixing bowl.

2) Add the dry milk. Beat at high speed with a mixer until it stands in peaks. A tip: Chill the beaters and bowl before starting for the best results.

3) Add the sugar, vanilla and lemon juice. Beat, beat, beat until firm.

4) Chill and top pudding and desserts.

I will drink soy, oat, or almond milk, but in my home, I prefer cow's milk.

I like having items in my pantry so if I wish to make a dish, I don't have to run to the store first -- I never have to fetch a box of pudding mix, or whipped topping as I can reach for ingredients in my pantry to make them myself ... usually cheaper and I know what's in it. 


You may also enjoy:
The Food Revolution
All About Cocoa Powder
Digestive Biscuits Vs Marie Biscuits
9 Ways To Save Money At The Supermarket

Friday, September 7, 2012

Greenmarkets, Community Gardens And CSA's

Like many of you, I am more mindful about the food I buy these days. I am concerned about where it comes from, what it takes to get it to our tables and whether it's really food, or just food-like-substances.  Concepts like "farm fresh," "eating local" and "sustainability" are now considerations while I'm grocery shopping.  Although I still love a steak or sirloin burger -- grilled to perfection, occasionally -- these days I eat more of a plant based diet, including lots of leafy greens and fresh vegetables, smaller portions of meat, and even many meatless meals, substituting other proteins like dairy, eggs, soy and fish. I care about the planet and the welfare of the other people who occupy it -- and truthfully, eating healthy produce and plant proteins isn't much of a sacrifice. Variety is the spice of life, and I like grains and vegetables.

Furthermore, I like how urban areas are embracing greenmarkets, community gardens and rooftop beekeeping.  Metro-New York, recently reported that Brooklyn Grange, a farm that sits atop of two buildings in the Brooklyn Navy Yard, “produces kale, cherries, eggs and honey, all sold at restaurants and farm stands across the city.”  How cool is that?  A 43,000 square-foot, sky farm growing cucumbers and eggplants high above the concrete, people and activity of Gotham city.

Small related businesses are also springing up.  Partners Doug Muller and Ken Green created the Hudson Valley Seed Library, a company which only sells seeds that thrive in New York's climate and soil.  So a New Yorker who wants to grow salad greens in his windowsill, or broccoli in his community garden can buy the right seeds for his region.

Community Supported Agriculture, or CSAs are becoming especially popular among city dwellers in many states.  [To find one in your area go here.]  Members pay for an entire season of fresh produce, than pick up their boxes of ever changing vegetables weekly. Recipients of the harvest enjoy quality, variety and new taste sensations.  Fellow blogger, Becky's Big Bytes, keeps readers up-to-date with her discoveries and recipes here.  She asked me to post one of my recipes.  So Becky, as the inspiration of today's post, here it is:


 Mock Fried Green Tomatoes And Eggplant 

Ingredients:
2 - 3 big green tomatoes, sliced
1 large eggplant, sliced
Salt, black pepper and seasoning (garlic, onions, etc.) to taste
A little extra virgin olive oil
Uncooked oatmeal and Grapenuts cereal, or breadcrumbs

Directions:
1. Brush two cast iron or aluminum skillets with a little olive oil and heat on your stovetop.
2. Season the slices of vegetables and lay each in separate pans.
3. Top with the oatmeal and Grapenuts (or breadcrumbs).  I rarely buy breadcrumbs, so I just use the cereal.  I coat both sides of the vegetable slices with olive oil right in the skillet and sprinkle on the cereal for crunch.
4. Fry until tender and golden brown. 
5. Flip and brown the other side.  

If you prefer, you can bake the vegetable slices in a cast iron skillet in an oven at 350 F for 25 minutes, or until golden brown.  Either method works.  At times you should get wild and crazy by using a few pads of butter to flavor.  Butter is the secret ingredient, which makes restaurant food so delicious according to several chefs.

Serve with a protein (such as ham) and a starch (I like potatoes, or corn) and enjoy!
Plate

Thursday, February 11, 2010

Secret Recipes From Popular Restaurants


Have you ever eaten a meal out and liked a dish so much you coveted the recipe so you could enjoy it more often at home? My friend, Cara S., loves the caramel pie served at the family-style restaurant, O'Charley's. She was so happy when her detective work turned up its list of secret ingredients and instructions for how to make it. And who benefited? Friends like me!! Recently I discovered just how easy it is to prepare miso soup at home. The home version takes less than 15 minutes to fix, tastes exactly the same, and is inexpensive compared to what you pay at a Japanese restaurant. And from Chef Mike Colameco, who has worked at the legendary Tavern On The Green and reports on New York restaurants, I picked up a (can't be beat!) healthy kale and black-eyed peas dish -- that is appetizing as a hot side, plus makes a delicious refrigerated snack.

Here are the recipes:

Miso Soup
Sauté vegetables of your choice, such as onion, carrots, cabbage, cauliflower in 1 teaspoon olive oil until tender.
1. Stir in 2 cups water
2. Add any, or all of the following – seaweed, mushrooms, soba noodles and cubes of tofu, or cooked chicken.
3. Add 2 tablespoons miso paste (or to your tastes).
[When I don't have fresh vegetables on hand, I simply thrown in a cup of mixed frozen vegetables and dried seaweed.]
4. Cover and simmer for 5-10 minutes and serve. Makes 2 bowls.

Mike's Vegetarian Kale & Black-Eyed Peas

1. Blanch 1 bunch Kale in salt water and drain.
2. In a large skillet, sauté 1 medium red onion, 1 large red bell pepper, fresh garlic, and 2-3 carrots until translucent and tender.
3. Cut up the blanched kale and add it to the skillet.
4. Salt and pepper to taste.
5. Add a 16 oz can of black-eyed peas [or cook ahead one-half bag of dried black-eyed peas.]
6. Simmer the mixture until all vegetables are tender and ready to eat, adding more olive oil as needed.
7. Serve warm as a filling side dish.
8. And, refrigerate the leftovers to eat as snacks. When eating it cold, you can add cider vinegar to jazz it up.

O'Charley's Caramel Pie
1. Pour 2 (14 oz.) cans of sweetened condensed milk into a 9 inch graham cracker crust.

2. Cover with aluminum foil.
3. Place in the oven on a baking rack above a bottom rack with a filled large pan of hot water. This keeps the pie filling from drying out.
4. Bake at 425 degrees F for 1 ½ hours until thick and the sweetened condensed milk turns to caramel. Watch carefully to not over bake.
5. Top with whipped cream and crushed peanuts.

There are a number of websites where you can find free copycat recipes. Click here. With a little ingenuity, serve your restaurant favorites at home, minus the check.


You may also enjoy:
Real Italian Cooking
Jamie Oliver: The Food Revolution
German Chocolate Sauerkraut Cake
Let's Make Hummingbird Cake

Saturday, March 26, 2022

America's Test Kitchen's Poulet au Vinaigre

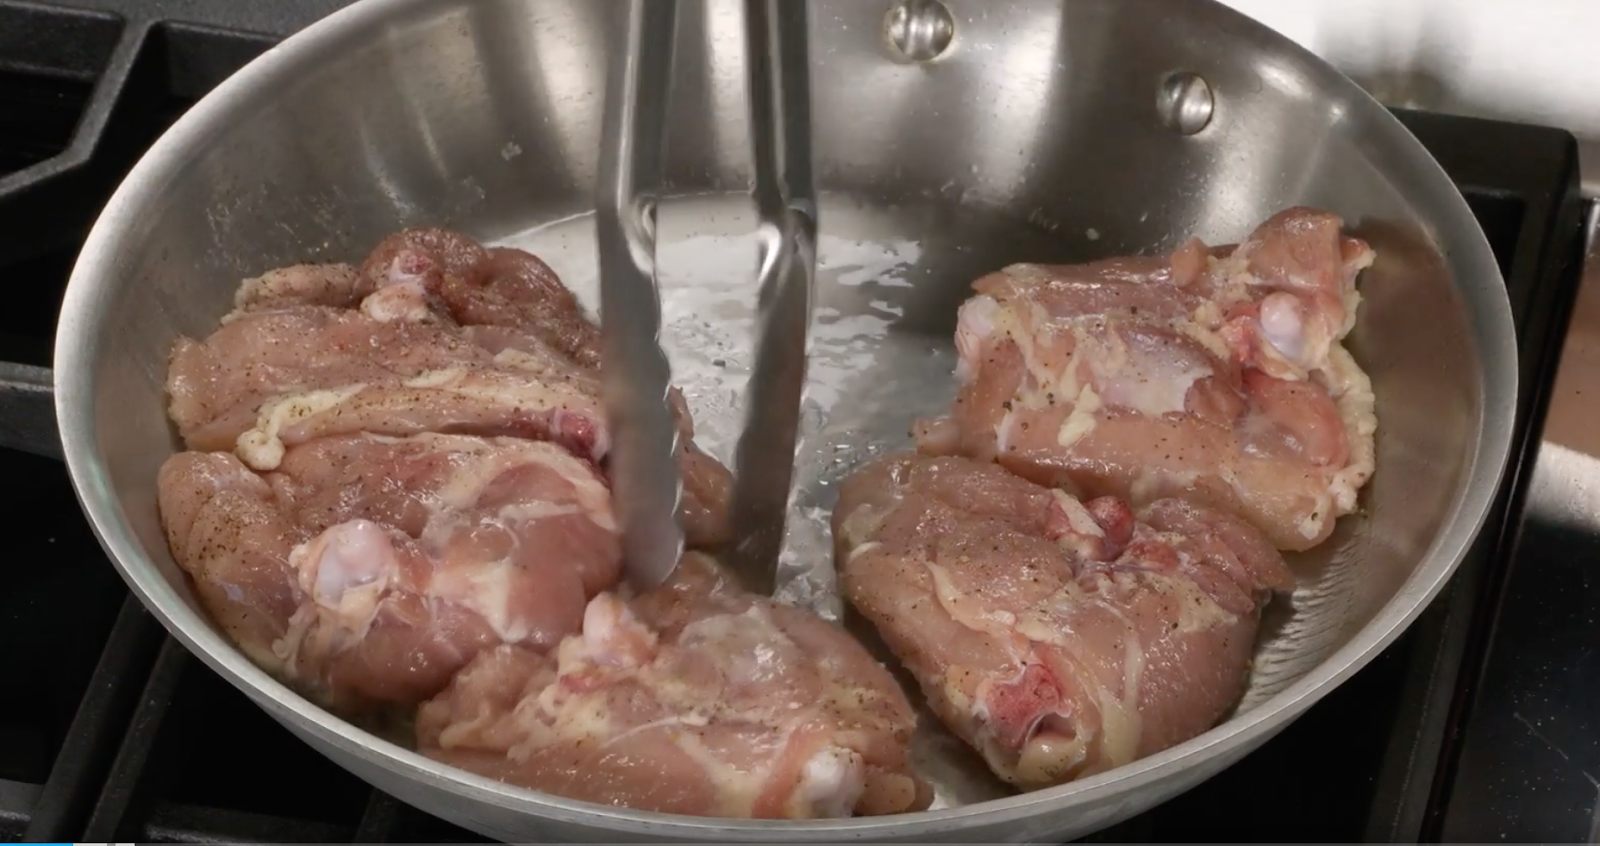
All photos: America's Test Kitchen and the video footage is linked below.

Today I'm sharing a chicken in vinegar dish featured on America's Test Kitchen, watch here. It originated in Lyon, France. As someone with German ancestry, I can appreciate food with vinegar as a flavor. Delish!

A fancy French name to Anglo ears for a simple and scrumptious one-pan recipe, and readers, you know how I love to prepare healthy, real food in a single pan, i.e., no-fuss dinners as there's less to clean up after you finish! Here's the tasty recipe in written form -- you're welcome!

Poulet au Vinaigre a/k/a Chicken in Vinegar

Ingredients:

8 chicken thighs - trimmed and dried with a paper towel, but leave the skin on the back of the chicken
1 1/4 teaspoons salt
3/4 teaspoon pepper
1 tablespoon vegetable oil
1 shallot, minced
2 peeled garlic cloves, diced
1 cup chicken broth
1 cup white wine
1/3 cup red wine vinegar
🍴🍽🍷
1 teaspoon of tomato paste
2 tablespoons butter
1 tablespoon tarragon
1 extra tablespoon red wine vinegar

Directions:

1) Salt and pepper the chicken thighs on both sides.

2) Heat 1 tablespoon of vegetable oil in a 12-inch skillet. 

3) Lay the thighs in the hot oil and brown them.

4) Add the sliced garlic. Sear the chicken for 8 minutes.

5) Turn the chicken over and cook the other side for 3 minutes. They will be crispy, but not fully cooked at this stage.

6) Remove the seared chicken from the pan and transfer it onto a plate. From the frying pan and into a separate bowl, pour off all but two tablespoons of the chicken fat.

7) Next add the minced shallots to the remaining two tablespoons of chicken fat, stir and cook with the brown chicken bits left in the pan.

8) Pour in one cup of chicken stock.

9) Add a cup of white wine followed by a 1/3 of a cup of red wine vinegar.

10) Return the chicken thighs to the pan and liquid - the crispy skin side up.
11) Next slide the pan into a heated 325 degree F oven and bake for 35 - 40 minutes. Make sure the temperature of the chicken reaches 195 degrees on a meat thermometer.

12) Remove the chicken and place the pieces on a plate.

13) To finish the sauce that's left in the frying pan, bring it to a simmer, then add a teaspoon of tomato paste, two tablespoons of butter, a tablespoon of minced tarragon, and an additional tablespoon of red wine vinegar. Whisk the gravy until it thickens.


14) Pour the sauce around the chicken on a plate or serving dish, then tilt the plate to 
distribute the sauce everywhere and under the chicken.


Serve each hungry diner 2 thighs. 
Eating this dinner at home costs pennies compared to ordering it in a restaurant.
 
As regular readers know, recipes end up on THE SAVVY SHOPPER so I, myself, can return here to make them again. The blog serves as our electronic recipe box. 

In this recipe, you can substitute chicken breasts if you wish. Although in general, I prefer white meat to dark, professional chefs tend to say chicken thighs are the juiciest, most flavorful parts of a chicken, therefore I use thighs in this dish. Try it the first time and note: Test Kitchen mentions in France, a mix of chicken parts goes into the dish, but using all thighs in lieu of a mix of different chicken parts ensures the chicken cooks uniformly. What I love about America's Test Kitchen recipes is they try making dishes several ways before settling on the best ingredients and methods for the dish for us, its viewers. Bon Appetite!
Here's an extra photo too delectable to not post. It's of step 12, getting ready to pull the chicken out and plating it, to finish the sauce.


You may also enjoy:

Sunday, August 16, 2015

Maangchi's Homemade Kimchi


Forgive me if I brag a little. This city gal just made kimchi, a spicy pickled cabbage, which is the national dish of Korea. Korean food was new to me when I moved to New York City, but I took to it like a duck to water. The variety of tastes and textures make it one of my favorite cuisines. The food often includes all 5 tastes: sweet, sour, salty, bitter, and umami. Many dishes are fermented. I'm getting hungry just thinking about it! If you find yourself in Manhattan, the Korean restaurants are on the side streets that surround Macy's Department store at Herald Square.

Consider that approximately 7 pounds of bacteria (100 trillion) live in your intestines, helping you to digest your food. According to medical studies, fermented food is super healthy for us, providing our digestive tracts with good bacteria and offsetting bad bacteria, so we should eat fermented food regularly. Kimchi is a delicious way to do it!

I learned how to make kimchi by watching a wonderful teacher, the Korean cook, Maangchi's YouTube videos. Not only is she a good teacher, she is funny! Maangchi shows us how to make kimchi three ways. I recommend watching all three videos to understand the process, then perhaps starting with the fastest way, her emergency kimchi.
Striving for an authentic batch, I ordered Korean red pepper flakes and fish sauce from Amazon. I also let my kimchi ferment for several days at room temperature before storing it in the refrigerator, unlike Maangchi who eats hers right away in the video. I know from watching her easy kimchi and traditional kimchi videos that letting it ferment for days makes sense. And if you wonder, flavoring the cabbage with fish sauce doesn't give it a heavy fishy taste. After fermentation, the dish marinates into a unique kimchi taste.

I'm surprised at how easy kimchi is to make. In a supermarket, a tiny jar costs $6+. When making kimchi at home, you get a huge batch of spicy, pickled deliciousness with one head of cabbage.

Extra tips:

1. On my second try, I made a bigger batch of emergency kimchi, using a huge head of cabbage and adding: Daikon radish, a whole diced onion, and a diced ripe pear (to the original recipe). I think Maangchi would approve.

2. I added 1/2 cup of dried anchovies to one of my jars, which gives the kimchi protein and calcium. It tastes fine, but eating it freaks me out a bit. Staring at the tiny silverfish, who stare back at me! Never again!! (Why do I have a bag of dried anchovies? Well ... on a visit to a Japanese grocery store, I got carried away [as many Japanese were buying them. Monkey see, monkey do. :)]  As it turns out, I don't like them in miso soup either. Some people pop dried anchovies into their mouths as a snack, but unlike a potato chip, they have tiny heads and tails, so honestly I don't know what to do with them. Perhaps this?) But, I digress.

3. When canning, pack the kimchi tightly into the jar:
(a) Press the air out, but leave a tiny space at the top. As it ferments, the kimchi releases gas and liquid, which runs down the jar if you fill it to the very top. 
(b) Also be sure to spoon a little juice on top to help with fermentation. In other words, a jar of packed kimchi should be dry-ish, yet mixed, then topped with the paste. And note, as the kimchi ferments it gets juicier.

4. One big head of cabbage makes three 32 ounce jars, plus one 24 ounce jar (total: 15 cups) of kimchi. As a beginner, you can use a jar to sample: Open and taste it until the kimchi is as sour as you like before refrigerating the jars. You can pack it all into a single large container if you wish. The 32-ounce glass jars are easy for me to store in my refrigerator.

Maangchi likes to eat kimchi with rice. Next, I'll make her easy kimchi, then her kimchi and fried rice. She makes Korean cooking look easy. Bon Appetit! ... 잘 먹겠습니다

🌶Cheat sheet for Emergency Kimchi - Return after watching her video

Ingredients:

Head of cabbage
Daikon radish, Julienne sliced
2 - 3 carrots, Julienne sliced 
onion, chopped, 
4 - 5 cloves of garlic, chopped
1 tablespoon of hot pepper flakes 
1/4 cup of fish sauce
1 tablespoon of sugar
1 tablespoon of all-purpose flour dissolved in 1/4 cup of white vinegar (I like to add this flour mixture -- it's from another of Maangchi's Kimchi recipes.)

Update: She published a book of her recipes: Maangchi's Real Korean Cooking.

Extra Tip: In a Manhattan apartment I don't let my cabbage soak in its salt bath long enough (12 hours+) to soften, and I don't like it raw, so I speed the process up by cutting my cabbage into pieces and blanching them in a stockpot of saltwater (add a teaspoon of salt) for 5 minutes after it begins to boil. It shouldn't be fully cooked like boiled cabbage. Using a colander, I drain the water. While the blanched cabbage cools in the colander, I shred the carrots and Daikon radish and dice the onion. After it is cooled, chop the blanched cabbage finer if you wish. Now you are ready to mix the vegetables together with the fish sauce, tablespoons of flour, sugar and white vinegar, and Korean red pepper flakes. Pack the kimchi into containers and let it ferment for several days before refrigerating.
My beautiful inside-and-out, Korean-born friend, Jennifer, gifted me a real kimchi container. It fits a huge 8 - 10 pound cabbage worth of kimchi. Start with Mason jars until you can visit a Korean import store. 


You may also enjoy:
Macy's Is Getting A Facelift    
A Party At Ryan's Daughter
New York City On A Saturday Night
Breakfast In New York: Not Just Lox And Bagels Anymore

Thursday, May 12, 2022

Easy Homemade Strawberry Cake

Photo: KeyIngredient

I have a craving for a slice of strawberry cake and so decided to make one. A majority of recipes call for a box of strawberry jello, dried flaked strawberries, or 6 eggs, but c'mon ... an overabundance of ingredients to buy ... or just too eggy for my tastes. A homemade cake should be light, moist, and simple. Moreover, starting with a box of white cake mix? Fuhgeddaboudit! IMHO: There are 2 instant foods that make no sense to buy. They are: (1) instant rice and (2) cake mix since in using either one the prep isn't reduced, only the flavor. Hey, I say when you don't feel like making a cake from scratch, buy a cake from a good bakery! But finding a good bakery isn't necessary today, my lovelies, as here's an easy-peasy homemade cake recipe to follow using fresh strawberries, all-purpose flour, and only 2 eggs, items often in your pantry: 

Strawberry Cake

Ingredients:

16 ounces of strawberries: For 3/4 cup strawberry puree, plus 1/4 cup diced and mashed strawberries. You'll need to prep but can do it ahead of time. (See how-to below.)
3/4 cup sugar 
1 stick of butter softened
2 large (or extra large) eggs 
teaspoon vanilla extract (optional: use strawberry extract if you have it).
A squirt of lemon juice (optional)
2 cups all-purpose flour 
1 1/2 
teaspoons baking powder
1/2 teaspoon baking soda
A pinch of salt 
½ cup buttermilk

Preparation of the strawberries - Makes (a) 3/4 cup of strawberry puree and (b) 1/4 cup of diced, mashed strawberries: Toss about 12 ounces of strawberries into a blender to get 3/4 cup of strawberry puree. If necessary, add a 1/8 cup of water -- but strawberries are usually juicy enough. Next, simmer the mixture in a saucepan to reduce the liquid, and afterward cool the puree completely. Set aside. Dice and mash the remaining 1/4 cup of strawberries, then sprinkle a tablespoon of sugar on top, and set aside. This 2nd mixture will give your cake some chunks of strawberries in the texture. If you have extra strawberries, feel free to bump the chunks up to 1/2 cup that folds into the batter in step 5 below.

Directions:

1) Use an electric mixer to combine the sugar, butter, and 1/2 cup of the strawberry puree. Save the rest of the puree to make the frosting.

2) Add the eggs and vanilla, a squirt of lemon, and beat.

3) Mix in the all-purpose flour, baking powder, baking soda, and a pinch of salt.

4) Next add the buttermilk.

5) To the batter, fold in the diced, mashed strawberries with juice.

6) Pour the batter into 2-9 inch buttered and floured cake pans.

7) Bake in a preheated 350-degree F oven for 40 - 50 minutes or until done in the center.

Strawberry Frosting:

Ingredients:

1 stick of butter softened
The remaining strawberry puree
1 teaspoon of vanilla extract (or if you have it, a sprinkle of strawberry extract)
1 box of confectioner's sugar.

Directions:

1) Mix the butter, strawberry puree, and vanilla together, and add 1 cup of confectioner's sugar at a time to the mixing bowl until you get the right consistency of frosting. Use as much of the box as needed. I simply pour it in and stir. When it thickens into frosting without being too stiff or thin, I stop. I also add drops of milk if necessary.

When I was a young child we had a man who grew and sold strawberries by walking our neighborhood and yelling, "Strawberry, strawberry, straw-ber-ry man." This cake reminds me of him, an industrious, hardworking, city farmer.🍓

On Facebook, I learned our neighborhood once had a Ragman (who rode a wagon pulled by a horse) and a Popcorn Man who came around to sell their goods. I remember having a Fuller Brush Man, a Potato Chip Man, an Egg Man, an Avon Lady, and an ice cream truck. If they came to the house at the right time, they ate lunch or drank coffee with us.
🏇


You may also enjoy: