Friday, September 2, 2022

ATK's Cast Iron Beer-Batter Cheese Bread

Recipe and all photos - ATK - video linked also.

As you know, my lovely readers, the recipes I want to make again end up here on the blog so I can return to find them also. This one from America's Test Kitchen is a keeper because it is a very cheesy quick bread, therefore fresh oven-baked bread without the time of waiting for the dough to rise. The beer, yeast-in-the-beer, and cheese give this bread plenty of rich flavor. Since I always stock extra sharp cheddar, it's what I will use most of the times I make it, but you can use any robust or sharp cheese to make the bread.

Cast Iron Beer-Batter Cheese Bread 
(from America's Test Kitchen here)

Ingredients:

2 ½ cups all-purpose flour 
½ cup minced fresh chives 
2 tablespoons sugar
4 teaspoons baking powder
1 teaspoon salt
½ teaspoon pepper
2 cups Gruyère cheese, shredded (You can substitute extra sharp cheddar or any robust cheese if you wish.)
1 ¼ cups mild lager, such as Budweiser
3 tablespoons unsalted butter, melted

Directions:

1) Whisk together flour, chives, sugar, baking powder, salt, and pepper in a mixing bowl.

2) Stir in 1 1/2 cups cheese until coated with flour. 

3) Stir beer and melted butter into the flour mixture and just combined. Do not over-stir. Expect the batter to be thick and heavy.

4) Scrape batter into a well-greased 10 1/2 inch cast iron skillet. Smooth the top and sprinkle with the remaining 1/2 cup cheese.

5) Bake in a 450-degree F oven for 20 - 25 minutes, rotating the
pan halfway through the baking.

6) Remove from the oven and let cool for 10 minutes. Cast iron stays super hot for a long time, so handle carefully when (after 10 minutes) removing the bread from the skillet to cool for another 20 minutes.

Something to bake over the weekend to go with soup, chili, or stew! Or perhaps wine and a cheese platter. Bon Appetit!


You may also enjoy:

Thursday, September 1, 2022

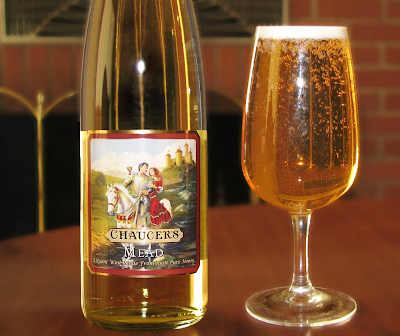
Tasting Mead Is On My Bucket List

Photo: Lifehack
Although I enjoy a glass of red wine with dinner, I don't drink more than a glass or 2 about every 4 - 12 weeks as I'd rather spend my calories eating than drinking. Unfortunately, you can't do both if you hope to maintain a healthy weight after a certain age. That said, I have never tasted mead and would like to!

The following newspaper article is so well written and since I know absolutely nothing about mead other than some vague notion that it was the drink of Vikings and medievals, I'm simply going to directly quote and link the article below ...

According to Rob Adams, a meadmaker interviewed in the Charlotte Observer, mead is " 'an alcoholic beverage made with honey and water, then fermented with yeast. It can range from sweet to dry. It can also be traditional (just honey, water, and yeast), or it can include fruit, vegetables, spices, herbs, or malted grains — like beer.' "

Photo: Lifehack

Continuing with the article: " 'To make mead, you blend honey and water to form a ‘must,’ which is what the watered down honey liquid is called before fermentation,'” according to Adams. He explains that " 'the term must is also used in wine and cider making.'

'Once you have prepared the must, yeast is added to convert the sugar from the honey into alcohol,' Adams went on ... 'Since honey is almost 100 percent sugar, you need to add nutrients during the fermentation so the yeasts are happy and healthy — and so they don’t contribute unwanted flavors.' "

Adams says," 'You can add fruit, spices, etc. at any point during the fermentation, depending on what flavor or aroma you intend to impart.' "

Age is the element that sets mead apart from cider and wine. 

Another meadmaker, Kevin Martin, explains that " 'Mead is likely the very first fermented beverage on earth ... which makes sense ... because honey as a sugar source was available before other processed sugars and sweetening methods.' "

The ingredients in a Basic Mead Recipe are the following:

10 pounds honey
4 gallons water
2 teaspoons yeast energizer
2 teaspoons yeast nutrient
2 packets of lalvin k1-v1116 yeast (wine yeast)

The website Lifehack has 10 Best Mead Recipes which look amazing!🍹 

So after reading my blog today, maybe I won't have to drink alone. Wouldn't you, too, like to have a refreshing glass of mead? Skàl! Have you ever tasted it? 


You may also enjoy:

Monday, August 29, 2022

The Barebones Anti-aging Skincare Products You Need

It so happens I have 3 friends who want to take better care of their skin and have asked for my advice on skincare products. I love it!
😍 
Photo: Depositphotos

In suggesting stellar products to my 3 friends I know 4 important details:

a) What they want their skincare to do: Target lines, wrinkles and dark spots as much as possible with anti-aging ingredients; 

b) A simple and easy routine:

c) Products that work without being too strong for their virgin skin;

d) Potions that are affordable and highly effective (i.e., backed by science without sticker shock).

We are also in the midst of inflation with people wisely economizing and trying to get the most bang for a buck. So without further ado, here are my rock-bottom with the least amount of steps recommendations, a/k/a --

A Skincare Routine With the Least Amount of Products For Less Money:

1) Wash your face with Noxema Cleansing Cream - It contains eucalyptus and camphor, anti-inflammatories used in Ayurvedic medicine. Cost: $4.47.

2) Treat your face by starting with The Ordinary Retinol 0.2% in Squalane and work your way up to The Ordinary Granactive Retinoid in Squalane 5% - Retinol/Retinoid converts to retinoic acid the Holy Grail of anti-aging ingredients. Cost: $7.50 - $14.95.

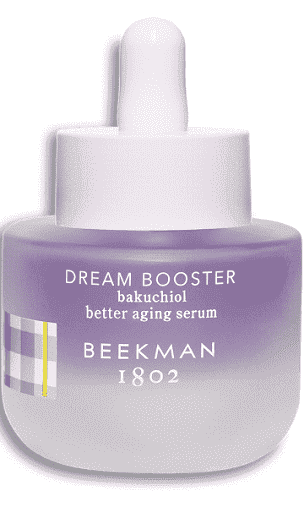
3) Moisturize your face with The Inkey List Bakuchiol - It has 1% bakuchiol, the new anti-aging wonder is backed up by a 2-blind scientific study showing it works, as well as, retinol. 1% is double the concentration tested in the study. Also, bakuchiol plays nice with other skin care products, so you can layer it without canceling the benefits of any other anti-aging ingredients you may be using. Cost: $11.49. {Learn more about the InkeyList here.}

4) Protect your face with the daily use of sunscreen such as Olay Sensitive Skin SPF 15 - SPF 50 - SPF 15 is a lightweight formula and provides sufficient protection as long as you reapply it every few hours. Higher SPF numbers don't give you much more protection, yet you don't need to reapply them as often. Doctors often recommend SPF 30 or SPF 50 because patients forget to reapply their sun protection. Walmart has an I can't tell the difference knockoff brand, Equate Beauty All-Day Broad Moisturizing Lotion, SPF 15. Cost $3.50 {complared to Olay's $10}.

The grand total of my suggested barebones, anti-aging-beauty-elixirs is $26.96.💋

How do 4 products and 4 steps that have you covered in anti-aging ingredients for under $30 sound? The whole shebang ... ultra budget-friendly and without compromise!🎯

🧴🧴🧴🧴🧴🧴🧴🧴🧴🧴🧴🧴🧴🧴🧴🧴🧴🧴🧴🧴

Honorable Mention for All Skin Types - the new one-step face serum for both morning and night:

2 ounces of a 1% bakuchiol serum from Imagine Dermatology for $16.12 is a steal! The formula also includes green, white and chamomile teas; hyaluronic acid, niacinamide (vitamin B3); glycolic acid; and, rosemary. You could use it in the morning (replacing Vitamin C serum if you use it) to brighten your skin and again at night (replacing retinol) to erase lines and wrinkles, plus this serum improves elasticity by increasing the production of collagen. Bakuchiol serums are gentle for sensitive skin that won't tolerate retinol.


You may also enjoy:

Thursday, August 25, 2022

Skillet Bruschetta


Photo: Pinterest

Are you ready for a late summer tomato dish that's perfect for the time of year when fresh tomatoes are plentiful? What are you going to do with all those tomatoes? I found this recipe in a newsletter and, of course, tweaked it. The original recipe called for marinating the chicken overnight, which I never do as I believe it does nothing for the meat, such as tenderizing or flavoring it. The benefit of marinating meat is a myth! All I think it does is add more work. Flavoring the dish while it cooks and after it's cooked works. I do think making the bruschetta topping hours ahead of time adds flavor, so let's start with that! BTW I also like the crunch and taste of onions and celery in the dish, so have added both vegetables (omit if you prefer).

Skillet Bruschella (with or without pasta)

Ingredients:

1 cup Italian dressing, divided (or use homemade vinaigrette dressing. You can then toss in Italian seasonings from your spice rack.)
2 cups (16 ounces) tomatoes, chopped
1 tiny onion, diced
1 celery stalk with leaves, diced
tablespoons basil leaves, chopped
2 whole garlic cloves, minced
Salt and freshly ground black pepper to taste
1 - 2 t
ablespoons olive oil
4 skinless boneless chicken breasts
2 large zucchini - cut into thin strips 

Optional: Al dente cooked angel hair pasta; #8; or #9 spaghetti -- they all work.

Directions for the Bruschetta Topping:

1) Into a bowl or Tupperware combine chopped tomatoes, onions, celery, basil, minced garlic, 1 cup of Italian dressing, and salt and pepper to taste. Cover and refrigerate from 2 hours - overnight.

Directions For the Chicken:

2) In a large skillet, heat 1 tablespoon of olive oil over medium heat, then add and cook the raw chicken for 15 minutes, turning it once. After the chicken is brown on the outside and white on the inside, remove it from the pan.

3) Add more olive oil if needed to the same skillet to grill the zucchini. 
The zucchini will tenderize in 6 -10 minutes. It will also cook down with the liquid evaporating. I scoop up some of the bruschetta topping (include some of the chopped onion, celery, and garlic) and toss it into the skillet to cook with the zucchini. Turn the heat off when everything is tender.

4) Plate your dish. Place cooked pasta on the bottom if eating it, chicken in the middle, and finish with the bruschetta topping. 

Adding al dente pasta to the dish gives you a one-pan meal ... protein, vegetables, and starch. Dinner is served. Tasty with fewer steps is THE SAVVY SHOPPER way! Enjoy.


You may also enjoy:

Monday, August 22, 2022

My Favorite Royal Crowns Of Europe

Imperial Crown of the Holy Roman Empire

Today I'm showing my jewelry-loving readers ornate, historical eye candy. My original idea was to feature in detail 10 famous Crowns of western countries, but guess what? In my research, I discovered Matt Baker of UsefulCharts has already compiled them and as usual, his work is excellent. Well, thundering typhoons ... Matt Baker, not only did you beat me by a year, you took away the illusion that my brilliant idea is unique ... the nerve!🙂

So instead, I'll play a game of picking my favorite European royal crowns leaning towards coronation crowns (since many European royal houses have more crowns than we can count). Thanks to Matt Baker's thoroughness, you can watch his video here for the history and details of my 6 favs (plus a few more on his list of 10 famous crowns). As it turns out he did the work for me on this topic!

So here are My 6 Favorite Royal Crowns - I've included not 1, but 2 from the United Kingdom because Queen Elizabeth II uses two. Both have crowned English and British monarchs, and I don't want to break them up. Drum roll, please🥁... here we go:

1) The Crown of Rudolf II, later the Imperial Crown of Austria - Made in 1602 to crown Holy Roman Emperor Rudolf II, it became the official crown of the newly constituted Austrian Empire in 1804 and today is preserved in the Austrian Imperial Treasury. The crown is pure gold, partially enameled, and scattered with diamonds, sapphires, rubies, emeralds, and pearls. Wow, the Ceylon blue sapphire at the top is stunning!

2) Imperial Crown of the Holy Roman Empire - Here is a side view in addition to the front view at the top👆 of the blog. Thought to be made in 962 AD in Western Germany for the coronation of Holy Roman Emperor Otto I, the crown has 8 hinged 22-carat gold plates of images joined together forming an octagon shape. It has 144 unfaceted stones including sapphires, emeralds, and amethysts, plus pearls. To think that it sat on the head of Charles V on February 24, 1530, along with prior Holy Roman Emperors and we still have it! Nowadays it is kept in the Imperial Treasury in Vienna, Austria.

The Imperial State Crown

3) (a) The Imperial State Crown [of the United Kingdom] - Shown is both the front and back view of the crown, it was selected by Queen Victoria and Edward VII for each of their coronations. Queen Elizabeth II uses the Imperial State Crown to open Parliament. It has 2,901 precious stones, including the familiar Cullinan II diamond, St. Edward's Sapphire, the Stuart Sapphire, and the Black Prince's Ruby (which is really a red spinel).💂

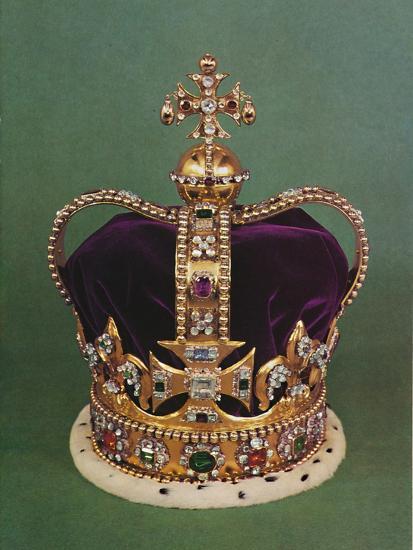
St Edward's Crown

(b) St. Edward's Crown (also part of the UK's crown jewels) - The original crown was made in the 11th century, named after the last Anglo-Saxon English King, Edward the Confessor, and remade for Charles II for his 1661 coronation after the Restoration of the English monarchy in 1660. It's considered the traditional coronation crown of English/British monarchs. George V, George VI, and Elizabeth II used it for their coronations. The heavier of the 2 crowns, it weighs 4.9 pounds and is set with 444 precious and semi-precious gemstones. Oh, a gal who's also a monarch cannot have too many stately crowns, can she?

4) Imperial Crown of Russia - First worn for the coronation of Catherine the Great in 1762 and last worn by Nicholas II in 1896. The crown also sat prominently on a chair when Nicholas opened the Russian Duma in 1906. Thankfully, it survived the Russian Revolution of 1917 and is currently on display at the Kremlin Armory Museum in Moscow, all 2,858 carats (or 4,936 single) diamonds, 75 Indian matte pearls and a 398.72-carat red spinel (once mistaken for a ruby).

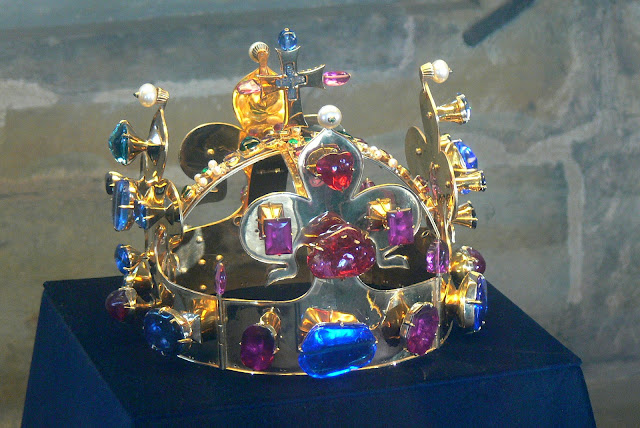
5) Crown of Saint Wenceslas - Made in 1347 to use for the coronations of the Kings of Bohemia (modern-day Czechoslavia). Ferdinand V was the last to be crowned wearing it in 1836. The crown is reportedly 22-carat gold. The stones decorating it -- consisting of 19 sapphires, 44 spinels, 30 emeralds, and 1 red elbaite -- are polished and not cut in facets so the crown is old-world vintage, colorful and charming! But a terrible "legend" follows it: "Any usurper who places the crown on his head is doomed to die a violent death within a year." (source: Wikipedia + others) Since I'm a gal just having fun as an admirer, notusurperwould I be cursed placing it on my head?

I cannot identify all of the above👆 coronation crowns but am happy they survived the centuries of history, and I'd love to visit each and every one of them. If pressured, I could be persuaded to try them on. (No, no I shouldn't ... I couldn't, I shouldn't, please no, no, no ... oh if you insist, alright.👸🏻
How about you? Feel free to name them or reveal your favorites in the comments.


You may also enjoy:

Thursday, August 18, 2022

Bakuckiol The Retinol Alternative


Most of us know how important retinol is to our anti-aging skincare regime. Well, there's a new kid in town.

Bakuchiol (which is a phytoretinol) is an anti-aging ingredient derived from the leaves and seeds of the psoralea corylifolia (babchi) plant. An herb commonly used in Indian Ayurvedic and Chinese medicines, dermatologists describe it as a natural vegan alternative to retinol. It has anti-inflammatory and anti-bacterial properties to heal, calm and smooth the skin.
According to a double-blind medical study published in the British Journal of Dermatology, using bakuchiol for 12 weeks was as effective as retinol in reducing wrinkles and hyperpigmentation ... yet was milder with less irritation, so is ideal for sensitive skin and in fact, is suitable for all skin types. In other studies, bakuchiol stimulated the skin to produce collagen, as well as, increased elasticity, and improved firmness.

In comparison, retinol is used at night to avoid sun degradation and skin sensitivity. Yet unlike retinol, bakuchiol's potency is not weakened by sun exposure and it doesn't irritate or dry the skin, so can be used both during the day and at night.
How much bakuchiol is needed in face serum, lotion, cream, or oil to do its job? Choose a bakuchiol serum, etc, with between .5 - 2% concentration for visible benefits. A lightweight bakuchiol serum or lotion layers beautifully with other anti-aging products such as vitamins C and E, azelaic acid, or niacinamide in your skincare routine. Furthermore, since bakuchiol also brightens the skin, some users are replacing their vitamin C serum during the day and retinol at night with just one gentle ingredient. On the other hand, don't combine bakuchiol with glycolic acid as these two kids don't play well together. Glycolic acid degrades bakuchiol's effectiveness.
Moreover, there are a ton of bakuchiol-based beauty products on the market in all forms: face serums, lotions, creams, and oils that are very reasonably priced -- many well under $20 so what's good for our faces is also good for our wallets! Ahhh, welcome to the neighborhood, bakuchiol, you are a Savvy Shopper's dream.

You may also enjoy:
Monday, August 15, 2022

The Best Homemade Jewelry Cleaner

Photo:WeddingWire and Shutterstock 

Truthfully I rarely clean my rings, earrings, bracelets, or necklaces at home, and only once have I taken my jewelry in for a professional checkup and cleaning. Luckily, the one time I did so was right before COVID shut everything down for 2 years. Why suddenly I decided to do so is a mystery, but I'm happy I did. A designer at Effy cleaned a few pieces for me, and we ended up talking for 3 hours about jewelry and life ... in 2019 before the world paused. What a fond memory!

Don't soak pearls in soapy water, wrap them in cloth.
Having our fine jewelry checked for loose stones and professionally cleaned is an important step in keeping it maintained and sparkling. I aim to become more diligent in doing it. Experts tell us to have our fine jewelry cleaned every 6 months, and I'll shoot for at least once a year. In reality, 6 months will blaze by before I realize it has.🙂

A few good habits I've already established include always removing my jewelry (consisting mostly of rings and earrings) when showering or doing household chores, and I apply hand cream ringless. With the exception of traveling, I always remove my jewelry before bed and put it in a safe designated place so the jewelry doesn't get tangled, damaged, stolen, or lost. In fact, everything in your home should have an assigned place. (Away from home I sleep without removing my rings and earrings so I don't leave them behind.)

Now I aim to get into the habit of cleaning my jewelry at home in-between yearly professional cleanings. The following is how jewelers advise we do it ...

The Best At Home Jewelry Cleaner is none other than soapy warm water. Everything else (vinegar, alcohol, baking powder, salt, or ammonia) is potentially too harsh on gemstones.

Tools and Directions:

1) Add a few drops of Dawn dishwashing liquid into a bowl. It could be any mild dishwashing liquid, but I notice many jewelers use Dawn and therefore so will I.

2) Fill the bowel with lukewarm (not hot) water. Let your jewelry soak for a few minutes to allow the soapy water to loosen any dirt. It turns out that soap works this same way in removing all grime, whether the dirt is on your hands or on your clothes. Soap works by loosening the dirt.

3) Stroke the prongs and around the stones with a new soft bristle toothbrush. Use a new, not an old toothbrush as an old toothbrush may have toothpaste residue on it that is potentially too abrasive for many stones.

4) Rinse with clean water - Some jewelers like to use distilled water for the wash and rinse cleaning cycles of jewelry. Personally, I just use tap water. :) 

5) Dry your washed jewelry by laying on and gently rubbing with a soft cloth.

Effy designed
Extra Tips:

1) To be ultra-safe only clean your diamonds, sapphires, and rubies at home as these are your harder more durable stones. Let the professionals clean your emeralds and softer gems unless you have gemstone knowledge. Emeralds have more inclusions and are brittle and oiled, and some other stones may be sensitive to a change in hot or cold temperatures. A jeweler will know the risks of each type of gemstone and how to properly clean them without damaging the stones. So if in doubt, leave a stone out of soapy water, and don't clean with ultrasonic or steam machines! At times I'll run an emerald under warm water.

2) Diamonds ByBonneJewelry dries her diamond rings (on the right👉) with a hot blow dryer to get them to glitter by preventing water spots from forming, but since I'm not a jeweler like Bonnie I'm too chicken to use a hot blowdryer on a piece. When in doubt, leave the heat out!

3) To rinse the jewelry I hold it under the running tap water of a faucet with the sink's stopper plugging its hole in case I drop the piece. If there's any chance your jewelry will go down the drain, go a step further and get out a 2nd bowl filled with clean rinse water. Be safe, not sorry!

So what did we learn today? The best jewelry cleanser for at-home cleaning is sitting right on your kitchen sink: Dawn dishwashing liquid in lukewarm water! It lifts away dirt and safely keeps your sparklers sparkling! Additionally, buy distilled water if you wish; and if brave enough, on diamonds only, dry with a blow dryer for extra shine.

Almost everyone has a few pieces of fine jewelry ... perhaps an engagement ring, or special occasion gift. Keeping it sparkling is simple!

Except where noted, I grabbed the jewelry examples from Macy's website. You always get lovely eye candy on THE SAVVY SHOPPER. You're welcome!


You may also enjoy: