Wednesday, May 23, 2018

Lunya Restore Sleepwear

Lunya Restore sleepwear is not exactly fancy or cheap. But it is FDA tested to give you a better night's sleep. How so, you may ask? According to the company, the pajamas are made of celliant, a fabric that converts body heat into infrared energy. The infrared energy returns to recharge the body every night (just like your computer devices do when plugged into a proper source). The claim is, it increases your energy, helps you recover from your day of workouts and sleep comfortably and better. I don't know what science says, but millionaire athletes such as Tom Brady do wear celliant performance clothing to help their bodies recover from their sports.

As sleepwear goes, I like the minimalist, basic style. It is soft, smooth, cozy and modest enough to wear as a guest in someone else's home. And, I prefer the sleep dress, in a color (over neutrals). But for $68 to just under $180 ... ouch, I wish it costs less!

For the money, I'd be tempted to buy their washable silk pajamas ... but they don't claim to have any recharging properties. So nah, let's go with advanced technology. To be honest, I am slow to spend this chunk of change on pajamas. Tom Brady, probably not!

What do you think?🐑 


You may also enjoy:

Friday, May 18, 2018

Lemon Elderflower Cake

Photo: AM-NY
Did your invitation to the wedding of Great Britain's Prince Harry and Meghan Markle get lost in the mail? Oh what a coincidence, mine too! Recently, I've looked for a tasty lemon cake recipe and as luck would have it, the Mountbatten-Winsors are serving a fancy lemon cake after the ceremony. For all my readers not attending the nuptials, nor the after parties, I've got your back. Have a slice of the royal wedding cake. Here is a recipe. (Theirs requries 500 eggs and 200 lemons!):

Photo: Huffington Post of elderflower blossoms
👑Ingredients for the cake

1 cup of sugar

1/2 cup (1 stick) butter
3/4 cup buttermilk (You can substitute milk if you wish.)
3 extra large eggs (Large works too.)
2 cups all-purpose flour
2 teaspoons baking powder
1/4 teaspoon baking soda
1/2 teaspoon salt
Juice of 2 lemons (1/4 cup), plus the lemon zest
2 tablespoons elderflower cordial (Ederflower liqueur can be substituted.)

👑Ingredients for the elderflower syrup

1/2 cup sugar
1/4 cup water
1/4 cup elderflower cordial

👑Ingredients for frosting

1-2 cups lemon curd (For homemade here.)
1 tablespoon elderflower cordial

🏰Directions for the cake:


1) With an electric mixer cream together the sugar and butter. 


2) Add the buttermilk, than the eggs, one at a time.


3) Next mix in the dry ingredients: flour, baking power, baking soda and salt.


5) Now toss in the flavors: lemon juice, lemon zest and elderflower cordial (or liqueur).


6) Pour into 2  buttered  9 inch cake pans and bake in a preheated 350 degree F oven for about 30 minutes (until the center is done). Remove from the oven and let cool.


Meanwhile make the simple syrup flavored with elderflower --


🏰Directions for the Elderflower syrup:


1) Combine sugar and water in a saucepan on a stove top. Bring the mixture to a boil. Simmer until the sugar dissolves. 


2) Turn off the heat and add the elderflower cordial. Let cool.


Prepare the frosting:


🏰Directions for the Lemon Ederflower Frosting:


💂Option A) To a jar of lemon curd (or use homemade) add a tablespoon (eyeball a squirt) of elderflower cardial.


💒Option B) The royal cake is reported to have a butter cream frosting: Toss room temperature butter, confectionery sugar and drops of milk in a bowl. Mix in lemon zest and elderflower cordial.


Photo: Huffington Post of elderflower berries
How to finish and frost the cake:

1) Next refrigerate the cake layers for a few hours.


2) Remove the 2 layers of cake from the refrigerator and make 4 layers by slicing through the centers in half, if you wish. If too difficult, no worries, a 2 layer cake will be fine too.


3) Brush the tops of the 4 cake layers (or 2) with elderflower flavored simple syrup, then top with the lemon curd (or butter cream) frosting. The cake has a messy (in a good way) look: Let frosting run down the sides and double or triple frost, if you like.


4) Decorate the top with cake icing flowers. You can improvise by putting the frosting in a plastic sandwich bag, then cut a corner off of one end, so the frosting can be squeezed out to make flowers. Or buy ready-made sugar flowers at the grocery store, it's in the cake aisle. You can get creative with berries; or sprinkles as flowers; or real ediable flowers; or just lemon slices cut as hearts and flowers.


Enyoy with a cup of tea!


You may also enjoy:

Thursday, May 17, 2018

7 Kitchen Tools Worth Your Money

Photo: Shutterstock
Now that you know what sits idle in my cabinet (click here), what tools do I use daily? If space or budget is limited, here are the work horses to buy: 

7 Kitchen Tools ... the Essentials:

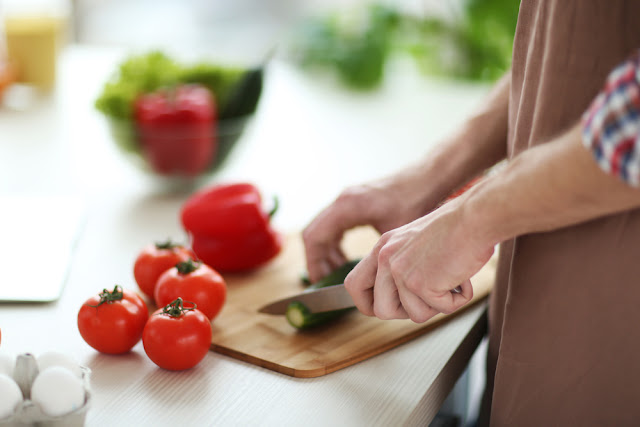
1) A Sharp chef knife - Slice and dice away! A sharp chef knife is indispensable to prepare fresh, healthy, real food such as fruits, vegetables and salads daily to keep us healthy. I use a 5" Santouku knife as my chef knife. (I was gifted a 7'' too, but really only use the larger size to slice whole watermelon.)

2) Microwave oven - Once I had a mid-size, but replaced it with a Sharp Carousel 1.4 cubic feet size. Don't let the compact size fool you! Reheats food on an 11 inch plate in 2 -3 minutes flat! You can also cook raw vegetables, make popcorn and melt butter or cheese fast. Such a useful kitchen tool for cooking meals in minutes.

Photo: Shutterstock
3) Pots and pans - The following sizes: (a) 12 inch chef skillet; (b) 4 quart sauce pan; (c) a large wok, (d) non-stick 10 inch skillet; (e) 10 1/2 inch cast iron skillet

I rarely grab other sizes, but use these pans continuously. Plus, I use my cast iron skillet to bake cornbread, pizza (from scratch), steaks, salmon and cheesecake. What a heat conductor cast iron is; food cooks evenly! A 12 inch chef skillet eliminates the need for 3 - 4 other pans. It is great for boiling whole spaghetti, as well as, cooking one-pan meat, starch and vegetable stews. I adore the easy-breezy clean-up of simmering one-pan meals!

One non-stick skillet to fry an egg is all you will ever need. Or you could just use your seasoned cast iron skillet (to save a purchase). I own both, but it isn't necessary.

4) Baking pans -  Mine are Nordic Ware -100% aluminum: (a) 2 - 17'' by 12'' baking sheets; (b) one medium baking sheet (see why below); (C) 9'' by 9'' square baking pan; (d) 2 - 9'' round cake pans - You can do every kind of baking, browning and grilling with these common sizes. 

I use the medium baking sheet as a shield against spills of cake batter or casserole juices. Avoid having to clean a mess in your oven at all cost! I use a medium inexpensive baking sheet instead of my better Nordic Ware baking sheets. 

I also have a Nordic aluminum loaf pan, but usually grab my cast iron skillet for baking meatloaf and bread. Can't beat this old standby! So the loaf pan is rarely used.

5) Osterizer blender - Costs about $25. An Osterizer is the pioneer of kitchen blenders. It is powerful, durable and does everything, including crushing ice for smoothies that the fancy $100+ blenders do. Eventually all blenders blow out with constant use, but it hurts less to replace this 14-speed super-trouper! So why spend more?

6) Food processor - 3 cup size - Not too big, not too small. Mostly I grind nuts in it. Sometimes I make low calorie ice cream too: Toss in a sliced frozen banana, drops of milk and pulse! Easy to store and half the price of the big boys. Unless you always prepare big batches of food, this size is plenty.

7) Hand held mixer - I bought a Black and Decker hand-held mixer with 6 speeds at a drug store about 20 years ago, which I use to mix all my cake batters and pasty. Best $12 I ever spent as it is still going strong. Sans fancy bells and whistles, the small mixer does everything a Big Stationary Mixer does, and the cakes and cookies turn out great. Heck, I burn a few calories by holding and twirling it around. This buy taught me to stick with the basics. 

So now let's include your experience. What Kitchen Tool Essentials can you not live without? The best bang for your buck is ...


You may also enjoy:
Shelf Helpers To Organize    
Selecting The Right Houseplants
Do You Have A Design Challenge?   
The Best Places To Go For Antiques And Home Decor

Tuesday, May 15, 2018

5 Kitchen Tools I Will Never Buy Again

Photo: tabla-restaurant
When we set up our kitchens we try to anticipate what will make our lives easier, better and effortless. But hindsight is 20/20. When we know better, we do better. For fun, I'll share a few of my purchasing mistakes.

5 Kitchen Tools I Will Never Buy Again:


1) Coffee bean grinder - When I rise in the morning, I never want to grind coffee beans so I can drink a cup of coffee. Although it doesn't require much time or work, it's an extra step I resist before having a shot of caffeine. And, ground coffee from a can tastes fine.

2) Hot air popcorn popper - Sits idle in my cupboard since I began the microwave-in-a-paper-bag method of making popcorn. Turns out the microwave pops 100% of the popcorn unlike the hot air popper.

3) Large capacity food processor - When this space hog died, I replaced it with a small 3 cup food processor. Cheap, compact and ample!

4) Crockpot - People rave about the convenience of cooking meals while they are not home. But, I worry about unforeseeable accidents preventing me from returning home as expected. It happened to me once. While the heat is on, better to be home. Moreover, the same slow simmering meals can be stewed on a stove top or in the oven while you are at home to check on them.
5) A set of pots and pans - A full set of pots and pans may be the biggest waste of all. You never use all the sizes. Finally, I donated the huge stock pot and mystery size to Housing Works (a charity), and I don't miss them! More space in the cupboard! Go to Home Goods/TJ Maxx and buy only sizes you need.

Since I have no spot for an ice cream maker, bread maker, pasta maker, tomato slicer, apple peeler, etc., etc, etc., Manhattan saved me from making a slew of specialized gadget mistakes! Bread is so simple to kneed and bake in the oven.

How about you? What kitchen tools have been a waste of your money?

Stay tuned: the next blog, Essential Kitchen Tools, will publish on Thursday! Watch this space to see if you agree with me.😊


You may also enjoy:
Buying Light Bulbs
A Nutmeg Mill ... Nice!
Pass The Pepper Mill, Please
Reupholster Or Buy A New Couch

Tuesday, May 8, 2018

Always Buy Good Jewelry Design

Queen Victoria's coronation ring
Queen Victoria had smaller hands then her predecessor, King William IV, so her carnation ring of a large sapphire, rubies and diamonds was made just for her. She left the ring to the Crown. It is part of the Crown Jewels.

Big rare Ceylon blue sapphires are rare in nature, making them expensive. What a shame to cover it up with rubies and close it off with diamonds. I wouldn't do a thing to this ring to preserve history. The ring has much British symbolism, but a better setting would show off the loveliness of all the magnificent top-notch stones.
As commoners much lower on the wage-food-chain, we don't have the luxury of poor jewelry design. A piece of fine jewelry we save up to buy becomes a waste if we don't love and wear it. What's more, many of us can't afford big, perfect stones. So the most important factor to consider is good jewelry design. How the stones are set and arranged matter. 

Don't worry. When you see good jewelry design you recognize it!

And guess what? With good design, less perfect stones can look stunning. A ring sparkles on a finger. Earrings glitter on the ears. A splurge without emptying a wallet is possible for a savvy shopper! So trust your eyes and your gut. Only buy what you love.

Diamonds (made of carbon) rate a 10 on the Mohl Scale of Stone Hardness. Sapphires (blue corundum, a mineral made of alumina and oxygen) and rubies (red corundum) are a 9, while emeralds (made of beryllium) rate an 8. All are hard enough for jewelry. Diamonds are common and plentiful in nature. Emeralds are rarer, followed by rubies, then sapphires. You should buy the gem you love not what costs the most. Why? Because jewelry is not an investment. And diamonds are not rare, but a demand created by marketing, beginning in the 1930s. Once you pay for a diamond ring and bring it home, it loses about half of its value.
The ruby and diamond pendent, belonging to Queen Victoria Eugenie of Spain, a gift from her grandmother, Queen Victoria.
Ruby and diamond pendent neckless created for Macy's. Not nearly as pricey as the Queen's, (the ruby and diamonds are smaller and less perfect),  yet beautiful.
Still  jewelry with good design looks gorgeous. Gems catch the light and sparkle when the work of nature (which takes 1000s of years) is improved by a skillful human hand.


You may also enjoy:
About Morganite
Lovely Freshwater Pearls
Macy's For Fine Jewelry ... Yes Or No?
Royal Engagement Rings: Let's Take A Look

Friday, May 4, 2018

Lousiville After The Kentucky Derby

Photo: horseracingnation.com
After watching the Kentucky Derby, a tourist must visit downtown Louisville for a friendly urban vibe. Main Street is lined with vintage, renovated buildings that have been turned into museums, restaurants, a bourbon distillery (offering free tastings!) and small shops.
Photo: Urban Explorer (The photo credit link no longer works. Since it became a broken link, I removed it.)

From Main Street head on over to East Market Street (which realtors have renamed NuLu) to explore the coffee houses, bars (with delicious food!), as well as, the clothing, craft, furniture, antique and 2nd hand shops populating the block.
Garage Bar: Photo on Yelp by Craig C.
Louisvillians are serious about their food, drinks and hospitality among other things. A down-to-earth city with plenty to see and do.
Photo: SkyBluePrint

During Derby Week festivities begin with fireworks (known as Thunder Over Louisville), the Pegaus Parade, the Belle of Louisville boat race and hot air balloon races. Moreover, activities need not conclude with The Kentucky Derby. So if making the trip to see the race, be sure to build in a day or two to linger in town. You'll have a grand ole time with the locals! Oh yeah, put it on your bucket list.🌹


You may also enjoy:
Refreshing Bourbon Slush
Since 1875: The Kentucky Derby  
The Pegasus Parade Before The Kentucky Derby
Angel's Envy In The Tradition Of Kentucky Bourbon

Thursday, May 3, 2018

Preventers of Woe: Food Savers & Sink Sani Sticks

At times inexpensive household helpers can make our lives simple. Troubleshooting waste and sink buildups before they occur saves time, steps and a few bucks in the long run. I will call these items ... 

Preventers of Woe:

1) A sheet of fenugreen paper is said to keep fruits and vegetables mold-free for 2-4 times longer. Fenugreen is a legume, which is similar to a peanut. So it is a natural way of preserving produce. Provided you don't have a peanut allergy, line the refrigerator crisper drawer with a sheet of it to stop berries, lettuce, tomatoes and peaches from spoiling too soon.

I have been layering my crisper drawers with sheets of paper towels along with an open box of baking soda in an effort to keep my fruits and vegetables fresh a tad longer, not knowing if my method truly works. This product is more of a sure bet. Consumer Reports ran a test. Fenugreen paper preserved strawberries a few days longer when stored in their original package inside a refrigerator. The sheets are cheap and reusable! $5-$6 depending on store. Ordered!
2) Sink Sani Sticks - Drop a Sani Stick of non-chemical enzymes down your bathroom sinks (or kitchen sink) once a month to keep drains flowling. I am careful to keep food and grease out of my kitchen sink, but use Sani Sticks in the bathroom as I wash moisterizers, coconut oil, argon oil and makeup off my face. Toothpaste, shampoo and hair conditioner goes down the bathroom drain also. 

Often while standing in line to pay at Bed, Bath & Beyond, someone will ask me if they really work. I think they do. The enzymes seem to stop oils from lotion and conditioners from clogging the drains. Sani Sticks won't dissolve hair. For that I unscrew a portal (easy, peasy) to remove hair from the drains ocassionally. My apartment super did it for me for years, but after watching him several times, it was a task I learned to do for myself.

Two cheap products to avoid bigger problems. Simple life free from strife. What Preventer of Woe helpers do you buy?


You may also enjoy:
Gadgets For A Small Space
Shelve Helpers To Organize
The Doctors' Home Remedies
DIY Rich Soothing Hand Cream

Wednesday, May 2, 2018

Chewy Nutty Oatmeal Bars

Photo: McCormick
For breakfast and snacks I decided to make a pan of oatmeal bars. Tasty and healthy; yet containing common ingredients (not special health food store ingredients). Because frankly, I don't want a job (like shopping) before starting a job (like baking). The basic recipe below happens to be glutton-free. (Further down, I have words to say about that.) Delicious!

Here is my recipe:

Chewy Nutty Oatmeal Bars

Ingredients:

1/2 cup butter (I substituted coconut oil, but either works. I had to polish off a bit of coconut oil.) 
1 cup brown sugar
3 extra large eggs
6 cups Old Fashioned (5 minutes) Oatmeal (plus extra for the top)
1 tablespoon baking powder
1/2 teaspoon baking soda
1/2 teaspoon salt
1/2 teaspoon cinnamon
1 teaspoon vanilla
 A sprinkle of nutmeg
1 cup walnuts
1 cup raisins (or a mix of dried fruit)
drops of buttermilk (any milk works) for moisture - about 1/3 cup
whole almonds to press on top

Directions: 

1) Using a fork, whisk the butter, brown sugar and eggs until creamy.

2) Mix in the baking powder, baking soda, salt, cinnamon, nutmeg and oatmeal. 

3) Fold in the nuts and dried fruit.

4) Next add the buttermilk, several drops at a time to moisten the mixture. Avoid a runny texture. 

5) With a spatula press the dough into a 9'' by 9'' oiled baking pan. Be sure to even the dough out. Then press the almonds into the top of the oatmeal dough. Sprinkle a little dry oatmeal on top for looks.

6) Pop into a preheated 350 degree F over. Bake for 20 - 30 minutes. Remove when done (the top gets slightly brown).

7) Scrape the sides of the pan with a knife to loosen, then let cool before cutting into bars. Enjoy!

Extra tips:

1) The basic recipe is super healthy and mildly sweet. If not sweet enough, you can always drizzle a frosting on top. Brown sugar, honey, and white sugar are the same health-wise. Despite the claims, one is not healthier than another. Use all in moderation. I use brown sugar in these bars for the taste alone.

2) If you want more cake-like-bars, add 1 cup of all-purpose flour (a glutton) and another 1/2 cup of sugar to your batter. (Know that the basic recipe is delicious as is.) And know, there is no health reason to go glutton-free if you can digest glutton.

3) To turn a breakfast bar into a dessert bar, feel free to jazz the recipe up by adding: a cup of peanut butter; a cup of caramel squares; a cup of chocolate chips; a cup of coconut; or a mix of any of the mentioned to your batter.
4) Yes, you can leave out raisins if you dislike them. I like adding raisins for sweetness, texture and they keep baked goods fresh longer.

Oatmeal breakfast bars have all the goodness of a hot bowl of oatmeal ... and are easy to pair with a cup of coffee, or glass of milk. I make a batch, eat some immediately and the rest gets tossed into the freezer. Later, remove the squares from the freezer and microwave for 30 seconds, or so to eat.


Get your pastry fix the healthy way!


You may also enjoy:

Healthy Real Food Is Not Expensive    
Who Shares The Shape Of Your Face?
9 Ways To Save Money At The Supermarket   
Spring Forward In Style With Those 5 Easy Pieces