Showing posts sorted by date for query soup. Sort by relevance Show all posts

Friday, October 21, 2022

Beer Can Chicken

Photo - istock by Getty

I haven't thought of making Beer Can Chicken in years. My mother is European, and this is definitely Americana home cooking. What I like about this dish is its rub, a lot of it! A tasty and easy dinner to make over the weekend.

Beer Can Chicken

Ingredients For the Rub

2 tablespoons smoked paprika
Photo: allrecipes
2 tablespoons dry mustard
2 tablespoons basil
2 tablespoons garlic powder
2 tablespoons onion powder
2 tablespoons salt
1 tablespoon ground coriander
1 tablespoon ground cumin
1 tablespoon black pepper
1 teaspoon cayenne pepper

Ingredients for the Basting Spray

1/2 can of the beer
2 cups apple cider
2 tablespoons balsamic vinegar (or whatever vinegar you have)

4 - 5 pound chicken
1 tablespoon olive oil (or butter)
remaining half of beer (and can)

Directions:

1) In a bowl, mix the dry herbs and spices to make the rub.

2) Rub the raw chicken with olive oil (or butter) and then rub the chicken inside and out with the dry spice mixture. Or you can wet the dry rub with beer and smear the mixture all over and inside the chicken as this works too.

3) Pour half the can of beer into a spray bottle with the apple cider and vinegar.

4) Leave about half the beer in the can and insert the can into the cavity of the chicken with the chicken resting on the can.

5) Suburbanites can cook the chicken for 2 hours over a medium hot grill (350 degrees) under a grill cover. City coop dwellers can bake it in the oven for 2 hours resting the can with chicken on a baking pan. The beer keeps the chicken moist, as well as, adds flavor. While cooking you can spritz the chicken with the basting sauce every half hour to give it additional flavor. The sauce adds a hint of sweetness without sugar.

6) The chicken is done when it's golden and crispy on the outside and tender and juicy on the inside. Be careful removing it from the grill or oven and lifting the chicken off a very hot tin can onto a serving dish. Wait at least 10 minutes after removal from the heat before cutting.

Enjoy the weekend! Bon Appetit!


You may also enjoy:

Friday, September 2, 2022

ATK's Cast Iron Beer-Batter Cheese Bread

Recipe and all photos - ATK - video linked also.

As you know, my lovely readers, the recipes I want to make again end up here on the blog so I can return to find them also. This one from America's Test Kitchen is a keeper because it is a very cheesy quick bread, therefore fresh oven-baked bread without the time of waiting for the dough to rise. The beer, yeast-in-the-beer, and cheese give this bread plenty of rich flavor. Since I always stock extra sharp cheddar, it's what I will use most of the times I make it, but you can use any robust or sharp cheese to make the bread.

Cast Iron Beer-Batter Cheese Bread 
(from America's Test Kitchen here)

Ingredients:

2 ½ cups all-purpose flour 
½ cup minced fresh chives 
2 tablespoons sugar
4 teaspoons baking powder
1 teaspoon salt
½ teaspoon pepper
2 cups Gruyère cheese, shredded (You can substitute extra sharp cheddar or any robust cheese if you wish.)
1 ¼ cups mild lager, such as Budweiser
3 tablespoons unsalted butter, melted

Directions:

1) Whisk together flour, chives, sugar, baking powder, salt, and pepper in a mixing bowl.

2) Stir in 1 1/2 cups cheese until coated with flour. 

3) Stir beer and melted butter into the flour mixture and just combined. Do not over-stir. Expect the batter to be thick and heavy.

4) Scrape batter into a well-greased 10 1/2 inch cast iron skillet. Smooth the top and sprinkle with the remaining 1/2 cup cheese.

5) Bake in a 450-degree F oven for 20 - 25 minutes, rotating the
pan halfway through the baking.

6) Remove from the oven and let cool for 10 minutes. Cast iron stays super hot for a long time, so handle carefully when (after 10 minutes) removing the bread from the skillet to cool for another 20 minutes.

Something to bake over the weekend to go with soup, chili, or stew! Or perhaps wine and a cheese platter. Bon Appetit!


You may also enjoy:

Tuesday, July 19, 2022

America's Test Kitchen's Upside-Down Plum Tomato Tart

All photos courtesy of Test Kitchen -The lovely hands of Test Kitchen Cook Elle Simone 

America's Test Kitchen has perfected yet another delicious recipe and since they publish it for free, I feel I can share it with my readers, and I also link it back to the episode. My role is to give you (myself included!) a cheat sheet, namely, the written ingredients and directions, and a place to return to make it whenever you like. This savory tomato tart recipe mimics the same method used to make apple tarts, and it turns out that once upon a time tomatoes were called love apples.🍎🍏🍅 Watch the episode and see the recipe below:

Upside Down Tomato Tart

Ingredients:

2 lbs plum tomatoes, cut in half with seeds and juice removed
1/3 cup sherry vinegar
 2 1/2 tablespoons sugar
1/2 teaspoon salt
1/4 teaspoon pepper
1 medium shallot, finely diced
1 tablespoon butter
2 teaspoons thyme, minced
Extra 1/4 teaspoon each of salt and pepper
1 store-bought puff pastry or make the tart dough yourself from this recipe.

Directions:

1) Into a 10-inch skillet pour the sherry vinegar, sugar, salt, and pepper. Bring to a simmer and cook for about 2 minutes, swirling the pan to dissolve the sugar. 

2) Once the liquid is reduced to resemble caramelized syrup, add the shallot, butter, and thyme.


3) Next turn the heat off and add the prepared tomatoes. Distribute them evenly in the pan and coat the tamhatoes with the caramelized vinegar mixture. Finish off with a sprinkle of salt and pepper. 🍽

4) Bake in the oven at 400 degrees F for 1 hour.

5) Take your tart pastry dough out and on a floured surface roll it out 10 inches. Use a 10" plate as a measure to cut a 10" circle of dough. Chill the dough in the refrigerator while the tomatoes are baking in the oven.

6) After 1 hour, remove the roasted tomatoes and cover the skillet evenly with the chilled tart dough. Press the dough in at the edges of the skillet.

7) Return to the oven and bake for 15 minutes, then turn the skillet around to bake for another 15 minutes. After 30 minutes, the dough should turn golden brown.

8) Remove from the oven, and wait about 8 minutes before topping with an inverted 10-inch plate over the tart sitting inside the skillet. Quickly flip the plate and skillet over so the tomato side of the tart is face up.

9) Wait another 10 minutes for the tart to cool ... the toughest part of all as you smell the tomato tart aroma!

Sprinkle with more dried thyme. Cut into slices, serve and enjoy! 


We gratefully thank Test Kitchen Cook Elle Simone for perfecting this luscious and savory tomato tart recipe, always the best of the best, since as stated in the show's name, it's tested (and perfected!) for all of us to make at home!

This piece has my name on it. Where are my bite marks?


You may also enjoy:

Wednesday, April 27, 2022

How Many Grams Of Protein Should You Eat?

Photo: iStock free images

Since childhood, we've been told proteins are the main building blocks of the body. Every body part you can think of from muscles and organs to skin, nails, enzymes, and hormones is made of protein. And, what makes up protein? Smaller molecules called amino acids that link up to form chains. These chains of proteins link into longer chains to fold into complex shapes forming organs, muscles, hair, etc. (Source: Healthline.)

According to Healthlne, the best sources of protein are meats, fish, eggs, dairy products, quinoa, legumes, and nuts.

Aminal sources of protein are complete proteins as they contain all 20 amino acids. Many plant sources like legumes have some, but not all 20 amino acids and need to be combined with whole grains (or a glass of milk) thereby also becoming excellent sources of complete proteins. Bean soup with cornbread, peanut butter on slices of whole grain bread, and hummus on pita bread are tasty combinations forming complete proteins. 

So how many grams of protein do people need to eat each day to stay healthy? Well sources differ on the amounts, but a general consensus seems to be to get at least .36 grams of protein per pound of body weight; therefore a 130 pound woman would need about 46 grams of protein, while a 160 pound man would need about 57 grams of protein per day. Another recommendation is to eat 3 meals a day with each meal consisting of 30% - 35% of your daily protein requirements.

Doctors also note: A high protein diet can help dieters by decreasing their hunger and thus food intake and calories per day. Older people may benefit by eating as much as 50% more than the recommended daily grams for an average man or woman. Pregnant women and people recovering from injuries also seem to need more protein than the average person.

Although it was once speculated that too much protein could damage one's kidneys, this notion was never supported by science, and the benefits of consuming more protein far outweigh any feared harm.

When it comes to selecting foods to eat to meet your daily protein needs, follow your tastes and preferences and mix it up. Variety is the spice of life, and by rotating food you'll likely consume all the nutrients your body needs.


You may also enjoy:

Thursday, December 9, 2021

Introducing Saffron

In gourmet food stores, as well as T.J. Maxx, I see a spice that has intrigued me for years: Saffron, and yet I leave it on the shelf. As it turns out, saffron is the most expensive spice in the world, costing between $500 - $5,000 a pound. Unsurprisingly then that so little of it is always in the jar. The reason for its high price tag is the spice is very labor-intensive to harvest. Saffron derives from the Crocus sativus flower and the tiny thread-like flower blossoms (called stigmas) are each picked by hand. It takes 75,000 stigmas to make a pound of saffron.

Recently as I placed a Walmart order for spices Badia's Sazòn with Saffron (a salt) popped up on the screen, so I decided to put it in my online shopping cart (at $2.99!). Like the saffron flower blossoms, the salt is bright orange. 

After it arrived, I dicovered I've tasted this spice in Maxican cuisine and like its distinctive flavor in meat, rice, potatoes, stew, and soup. 

Saffron is thought to have several health benefits. It contains plant compounds that act as antioxidants to fight free radicals. It seems to reduce depression, PMS symptoms, and anxiety. There are claims the spice makes people more amorous. Not only can saffron alter mood in the brain, but it also reduces inflammation in the body. Research (that requires further studies) suggests it may have some cancer, heart attack, and Alzheimer's prevention properties also. And, it may reduce appetite to help with weight loss.

When eating a normal amount of the spice in food, saffron has no known side effects. Consuming too much of any good thing is bad, but with the cost of saffron, it's unlikely to be a practice in most households.

Next on my list of tastes to try is another expensive condiment I've never had, namely truffles. Several days ago, I saw dried truffle in the spices at our newly opened Trader Joe's for a few bucks. There's my chance!😁

What would you like to try?


You may also enjoy:

Friday, November 12, 2021

Pasta e Fagioli

Photo: From America's Test Kitchen - not their recipe below, but it's what the soup resembled in the Time Inc cafeteria. It wasn't as tomato red as I sometimes see it elsewhere.

Years ago I discovered delicious Pasta e Fagioli at work in Time, Inc's cafeteria. I'd love to make it at home but never had a sure-fire recipe. Time's Pasta e Fagioli seemed to have bits of ham or Italian sausage in it, definitely not the ground beef used by a few cooks and closer to bean soup than tomato soup. Although I can't procure the exact recipe, I remember the taste and texture to this day. The following recipe comes close enough for now:

Pasta e Fagioli

Ingredients:

1 lb of spicy Italian sausage or Italian bacon (Ham or hot dogs work also, then spice to taste. Drop in a few red pepper flakes. Add some green Italian seasonings.)
2 medium onions, diced
2 stalks celery, diced
4 carrots, diced
1 garlic bulb, minced (or 2 teaspoons of dried garlic)
4 cups water
2 large chicken bouillon cubes (which contain salt, so don't add more until you taste it before serving.)
2-15-ounce cans of Northern white beans (Feel free to use pinto or pink beans, etc., if it's in the panty. It will taste good). 
2 tablespoons tomato paste
2 teaspoons dried basil
2 teaspoons dried rosemary
1 bay leaf
1/2 teaspoon black pepper, or to taste
2 cups macaroni (or similar smallish pasta)
Sprinkles of grated Parmesan cheese - Add a sprinkle when cooking the soup, then garnish with the cheese before serving the soup.

Optional: Olive olive if you need it to grill the meat and vegetables  (see step 1 below).

Directions:

1) In a stockpot, brown the sausage, bacon, (or ham, or hotdogs) as it brings out the flavor. Toss in the onions, celery, and carrots as the sausage is browning. Towards the end, add the fresh garlic if using it. 

2) Next add the water and chicken bouillon cubes. (You can substitute chicken stock and salt to taste if you wish. I rarely buy chicken stock, so use water and bouillon.)

3) Mash one can of beans only. Add both cans of beans and diced tomatoes into the pot.

4). Follow with the dried spices.

5) Finally add your pasta and bring to a boil for about 12 minutes until the noodles are al dante.

My leftovers for the week.
Don't forget to garnish with extra shakes of parmesan cheese. This soup is a balanced meal with your meat, vegetables, and starch in a delicious sauce. I was always delighted to go down to the cafe to see it on the day's menu. Buon Appetitio!


You may also enjoy:

Thursday, August 19, 2021

Test Kitchen's Cast Iron Baked Ziti with Charred Tomatoes

All photos courtesy of America's Test Kitchen (Click ATK to watch.)

America's Test Kitchen, the television show, shared this recipe as a non-subscription freebie. It's a one-cast-iron-skillet dinner that promises to be as delicious as the more complicated, multi-pots-and-pans method of making baked ziti. The only other kitchen tools you'll need are a cutting board and a sharp knife. 
As usual, I like to post a winning recipe on THE SAVVY SHOPPER so I, too, can return here to make it again.

Food takes a big bite out of a budget, yet knowing how to cook ensures you eat healthy and delicious meals without a struggle. Now let's get cooking ...

Cast Iron Baked Ziti with Charred Tomatoes

Ingredients:

1 1/2 lbs grape tomatoes
1 teaspoon extra virgin olive oil
1 teaspoon salt
6 garlic cloves, minced
1 teaspoon tomato paste
1/4 teaspoon of red pepper flakes
12 oz of uncooked ziti
3 cups of water
1/2 cup parmesan cheese
4 oz of mozzarella cheese, grated
1/4 cup of fresh basil, chopped
Salt and pepper to taste

Directions:

1) Heat the tomatoes mixed with extra virgin olive oil and salt in a preheated 12 inch cast iron skillet and cook on medium-high for about 10 minutes, stirring periodically until the tomatoes are charred.

2) After the tomatoes are charred and start to break up, add the minced garlic, tomato paste, and red pepper flakes. Stir and cook for about 30 seconds more, or until you smell the garlic.

3) Turn off the heat and using a potato masher, mash the charred tomatoes into a sauce.

4) Next toss the uncooked ziti pasta into the skillet along with 3 cups of water.

5) Turn the heat back on high to bring it to a boil.

6) Reduce the heat and let the pasta cook under a lid, stirring often to prevent sticking until the noodles are al dente. This takes about 10 -12 minutes. Make sure the ziti cooks under the liquid to tenderize and watch as the liquid evaporates for consistency that is not too wet or too dry.

7) Next mix in the parmesan cheese and fresh chopped basil.  Also, salt and pepper to taste.

8) Top the dish with mozzarella cheese.

9) Finally place the cast-iron skillet into a preheated broiler setting in the oven. Stay with it by the stove. Let the cheese melt and brown, but watch carefully so neither the cheese nor pasta burns.

Cast iron skillets get blazing hot, and after pulling the ziti out of the oven, you'll have to wait for it to cool down. 

How I adore one-pan meals ... definitely, a keeper recipe, and an easy-peasy cleanup! The only tweak I made was to reduce the recipe by 1/3 so it fits into my 10 1/2 inch cast iron skillet. I also charred small plum tomatoes instead of grape tomatoes.
My Italian readers will cringe over a few substitutions: Although it is baked ziti, you could use curly noodles if it's what you have in the pantry or jarred tomato sauce in the winter. When I need a quick meal for just myself, I'm not above using #8 spaghetti noodles, and after plating it, melting the topped mozzarella in the microwave. [Yikes, did I just admit it? It is my way of making one tasty serving of pasta with no leftovers.] However, for guests make the dinner the Test Kitchen restaurant-worthy way. So easy and delicious. Enjoy!


You may also enjoy:

Friday, April 23, 2021

Easy French Onion Soup

Photo: Betty Crocker

It's hard to be a great French cook while limiting fat and calories in your meals. Today I'm making French onion soup for the first time ever and will not cut calories. I don't think it's the most nutritious soup to eat -- lower in protein than many, only one vegetable -- nor is it a low calorie soup ... but at times one must eat what one wants, and today that's French onion soup!

The homemade soup is sitting on my stovetop. It smells and tastes delicious. I sampled it! For tonight's dinner, I'll add the bread and cheeses, broiling the topping in the oven until melted and slightly brown. The quantity is 4 large servings:

French Onion Soup

Ingredients:

2 tablespoons butter
2 tablespoons extra virgin olive oil
4 large onions, cut in strips (not diced small)
2 tablespoons all-purpose flour
1 large beef bouillon cube (or chicken bouillon cube; or 3/4 teaspoon salt)
3 cups beef stock (or chicken stock - I use whatever flavor is in the pantry)
1/2 cup red wine (or white - I use what's open, most often red. The color doesn't really matter. If tasty to drink, the wine makes excellent soup:)
1 bay leaf
1/2 teaspoon sage
1/2 teaspoon thyme
1 teaspoon Herbs of Provence
Sprinkle of garlic
Sprinkle of dried celery
Tiny pinch of sugar
white and black pepper to taste
Extra 1/4 cup of onion, diced
Swiss cheese (buy a brick of cheese)
Parmesan cheese

Directions:

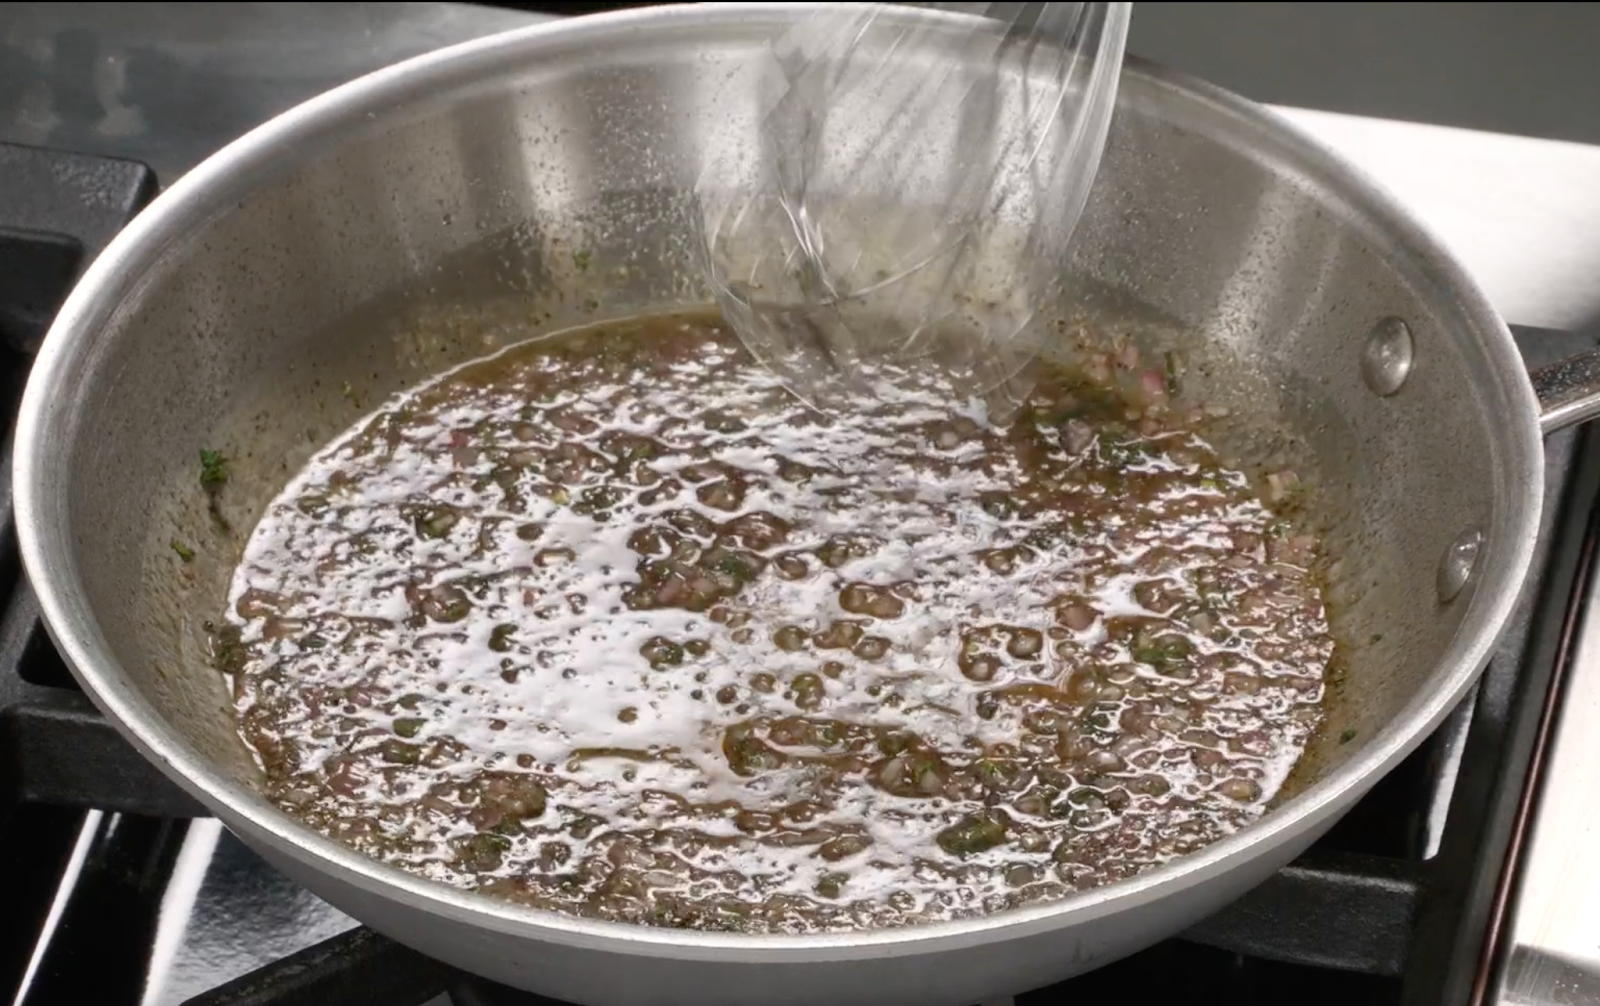
1) Toss the olive oil and butter into a stockpot and heat it, followed by the onions and simmer on middle-low heat for 20 minutes to caramelize. Cover with a lid. Watch and stir so the onion doesn't burn. After 20 minutes ...

2) Whisk in the flour. Add the bouillon cube (or salt, not both). You can add about 1/2 cup of water if needed to dissolve the bouillon. 

3) Next add the beef stock and wine; follow with your dried seasonings. Add a pinch of sugar too. Simmer on low-medium heat for another 30 minutes. (Without a boil, the soup won't cook properly, yet too high a flame cooks the water out. That's the dilemma. Make sure you have a low boil, not a robust boil.)

4) Near the end of the cooking time (like the last 10 minutes) dice another 1/4 cup of onion (get out another small onion) and 1/4 cup of the Swiss cheese and a sprinkle of Parmesan cheese and toss into the pot. This adds omph -- more flavor and texture.

5) Pour into soup bowls and top with bread and cheeses. Read step 6.

6) {a} - For myself, I lay a couple of slices of toasted multi-grain bread on the soup and then top with lots of Swiss and a sprinkle of Parmesan cheeses, broiling the bread-cheese topping in the oven until the cheeses are hot, melted and slightly brown.

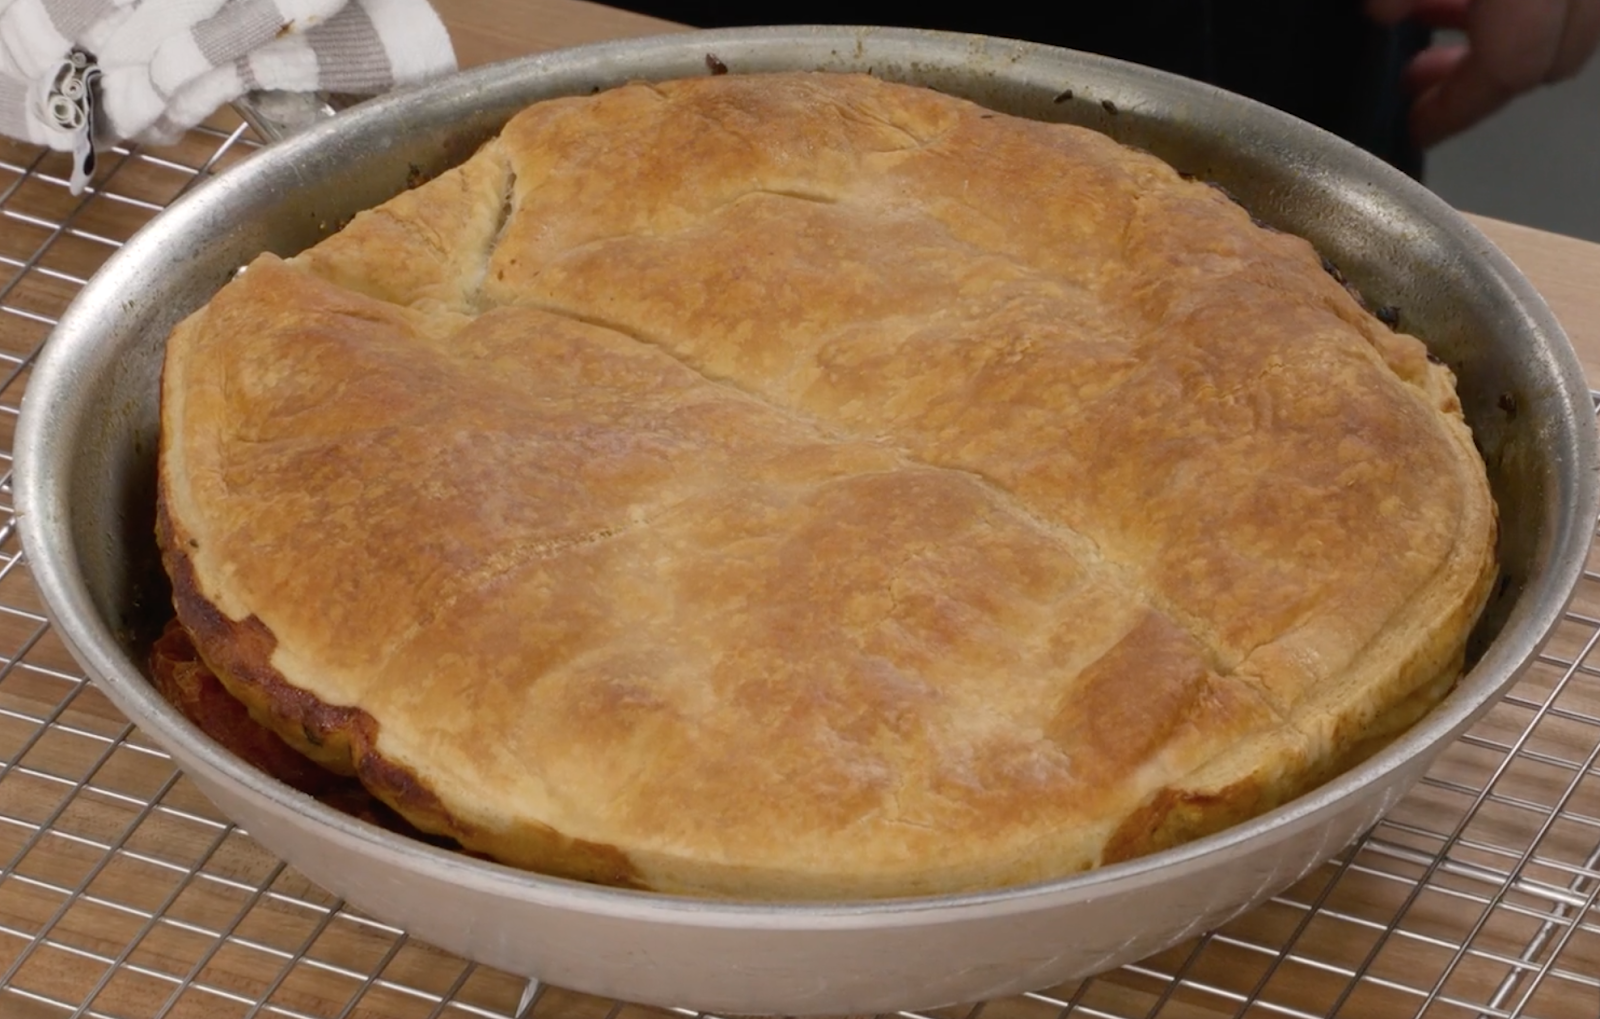
{b} - If I were to make this soup again for guests, I'd buy a loaf of artisan bread, cut it into thick slices, butter and brown the slices on a baking sheet in the oven, then top the bowls of soup with the oven browned bread peaked with plenty of cheese. Without guests, I skip this oven-browned-bread step to get out of the kitchen. Butter-less supermarket, toasted bread topped with cheese is fine for me! Still a success.
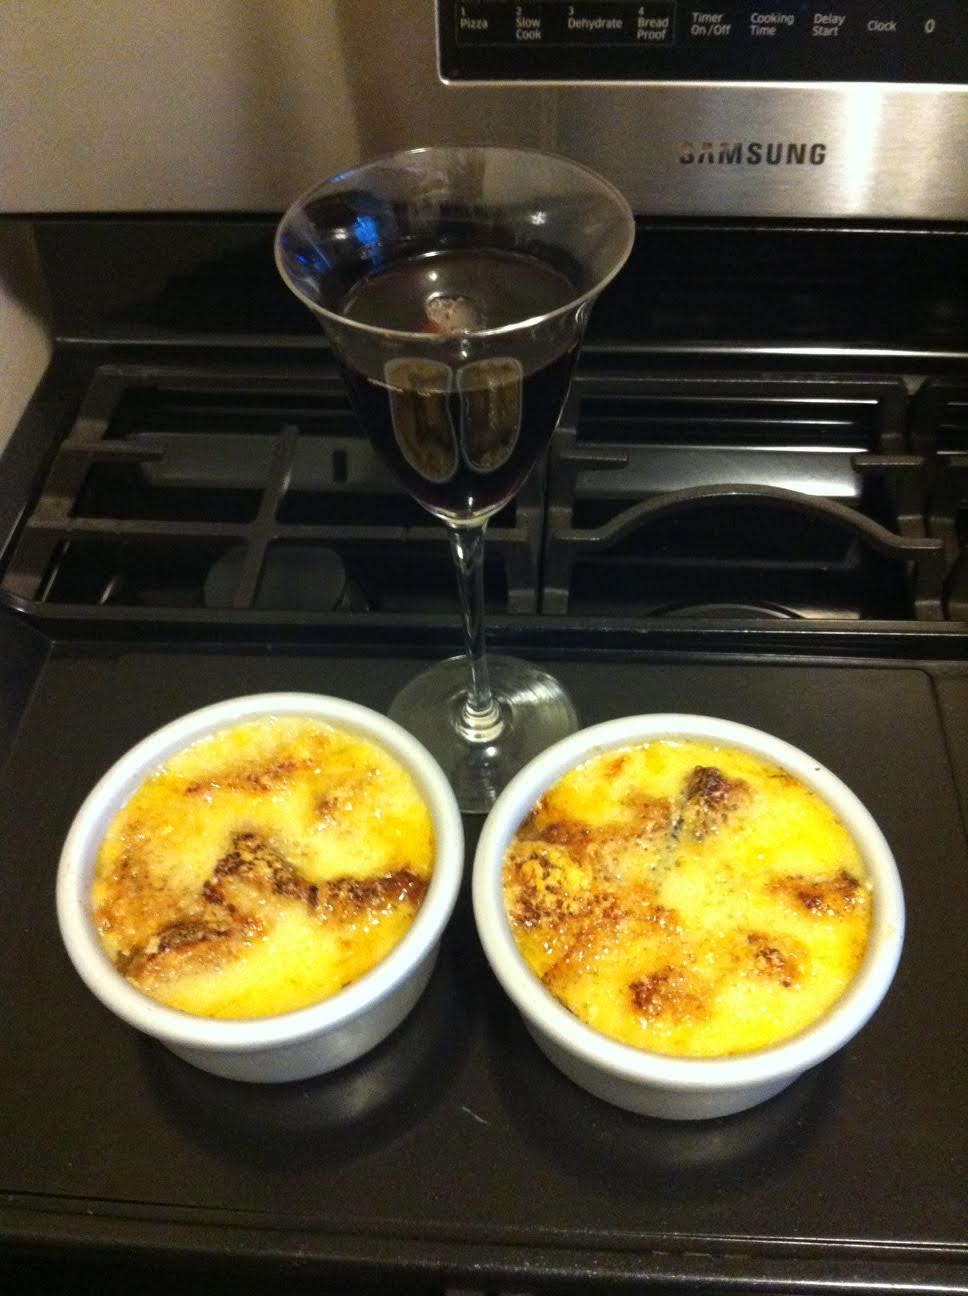
Update: Dinner is served at 6:50 pm. I'm afraid of ruining a mug or bowl by broiling, so I used mini cake pans, different, I know!
If I say so, myself, the soup looks, smells and tastes amazing! Restaurant worthy. Good enough for guests. Mine isn't as salty as I've eaten it out, so perhaps, it's even better.

Pandemic cook is back, sister!


You may also enjoy:

Thursday, January 7, 2021

Umami: A Sense of Taste

Step into my kitchen, friends😋.
Umami is one of the 5 basic tastes scientists agree humans have. (We may have a 6th sense of taste, yet 5 is the universal consensus.) The other 4 are sweet, bitter, salty, and sour. [Kikunae is the name of the 6th sense of taste - a richness or roundness that heightens and prolongs the other 5. Example slow roasted meat vs microwaved meat.] The word "umami" is Japanese, and it literally means "deliciousness."  It is best described as ''a pleasant savory taste" and is common in Asian cuisines. The taste comes from glutamic acid -- a common amino acid in vegetable and animal proteins. (Source: Healthline)

It turns out I love umami (in fact, since childhood over "sweet" before I knew its name). Fortunately, many foods with an umami flavor are healthy choices. They include miso and seaweed, aged cheeses, kimchi (
the Korean pickled cabbage), seafood, mushrooms, and in lesser amounts: green peas, tomatoes, corn, garlic, and potatoes. I love all of these foods! A favorite snack of mine [from childhood] is extra sharp cheddar cheese on saltine crackers or pumpernickel bread ... and I could eat them until they come out of my ears.🙂

A couple of New Years ago I blogged about my aim to replace canned soup with homemade soup. This I do, and now canned soups taste bland to me!

Moreover, sometimes we need a quick meal, so I have a recipe for fast homemade soup made on the spot without forethought or the luxury of time -- jazzed up umami flavored miso soup!

Nowadays most supermarkets carry tubs of miso paste for about $6 - $7 per pound or kilo. It gives family cooks the same convenience as opening a can of soup. And below is how I make it:

Debra's Miso Soup

Ingredients:

Water, about 2 cups
Dried seaweed, a handful
Frozen mixed vegetables (green beans, corn, lima beans, carrots and peas), a handful
If I feel like it, I also toss in a fresh diced carrot, celery, garlic, and onion
1 - 1.5 tablespoons miso paste (i.e., to taste)

Directions:

1) I fill a big soup bowl to about 3/4 full with cold water. Sprinkle in some dried seaweed, as well as, frozen and/or fresh vegetables.

2) Microwave the mixture for 10 - 12 minutes, or until the vegetables are tender.

areas of taste
3) Remove from the microwave and dissolve 1 - 1.5 tablespoons of miso paste into the mixture. The reason you wait to add the miso paste is you don't want to kill off the probiotics in miso by cooking it in the microwave. Miso paste doesn't need cooking, but easily dissolves in hot water.

Voilà tasty homemade umami flavored soup in minutes ... about as fast as canned soup! If you have leftover cooked chicken, beef, or wish to dice up tofu ... you can add protein to your soup. Or, make a meat, cheese, or peanut butter sandwich for a soup and sandwich dinner on fast-food night. Enjoy!


You may also enjoy:

Friday, October 9, 2020

Mini Italian Cream Cake


Sometimes I crave a slice of cake, not a big 9-inch cake that I must eat all week long to finish, but only a slice! So I bought two 4-inch Fat Daddy aluminum cake pans and got the idea to reduce the quantity of a cake recipe to make the equivalent of a slice of cake. I'm thrilled with the results! It took a pandemic to think of experimenting to make a single-serving cake, and in fact there's more than enough to share with a partner.

Nobody knows how Italian Cream Cake got its name since the cake is from the American South, not Italy. Here's how to make a 4-inch mini cake:

Mini Italian Cream Cake

Ingredients:

2 tablespoons butter
1 tablespoon shortening or vegetable oil
1/3 cup sugar
1 egg, separated
1 teaspoon vanilla extract
1/4 cup flour
1/2 teaspoon baking soda
1/8 teaspoon salt
1/2 cup buttermilk
1/4 cup chopped pecans
1/4 cup shredded coconut

You will need two small 4" cake pans, buttered and floured.

Directions:

1) With an electric mixer cream together the butter, shortening (or vegetable oil) and sugar.

2) Add the egg yolk and vanilla.

3 Next toss in the flour, baking soda and salt.

4) Add the buttermilk. If the batter is too thick, add a little more for a not too thick (or too thin) consistency.

4) Whisk the egg white in a separate clean bowl until stiff peaks form, then use a specular to fold it into the batter.

4) Next fold in the chopped pecans and shredded coconut.

5) Pour the cake batter into the 2 buttered and floured mini cake pans.

6) Bake in a 350 degree F preheated oven for 25 minutes or until the centers are done. The cakes will bounce back when touched. Remove from the oven and cool. Before the pans are completely cold lift out the cakes.

Italian Cream Frosting

Ingredients:
Ending up with 4 layers

2 ounces cream cheese, soften at room temperature
2 tablespoons butter, soften
1 box confectioner's sugar (You won't need the entire box.)
1 squirt of vanilla extract
1/4 cup of ground pecans

Directions

1) Toss the softened cream cheese, butter, vanilla, and confectioners' sugar into a mixing bowl and mix until smooth and fluffy Never measuring, I pour the powdered sugar into the bowl until I get the frosting consistency I desire. 

2) Spread the frosting on a cold cake in-between layers, as well as the top and sides of the cake. I cut my two 4'' cakes in half to get 4 layers of cake.

3) Sprinkle ground pecans all over the top of the frosted cake. 

Note: I don't need frosting for just myself to be as decadent. So I lightened it by omitting the butter and cream cheese. I used cottage cheese and skim milk instead of cream cheese because I didn't want to open a package of cream cheese I had to finish by myself. Sans butter, the frosting is less creamy. Not what I would serve guests, but the tastes still satisfies. It's good!
----------------------------------------------------------------
To feed more people here are the portions of ingredients for a 9-inch cake:

Full Size Cake

1 stick butter
1/2 cup shortening
2 cups of sugar
2 cup flour
1 teaspoon baking soda
1/2 teaspoon salt
5 egg, separated
1 teaspoon vanilla extract
1 cup buttermilk
1 cup chopped pecans
1 cup shredded coconut

Directions:

1) Follow the steps above increasing the amounts of ingredients. 

For myself alone, a no butter icing.
2) Use either two or three 8'' or 9'' cake pans to make either 2 or 3 cakes. Southern bakers usually make 3 cakes for 3 layers.

Full Size Cake Frosting:

8 oz cream cheese, softened
4 tablespoon butter, softened
box of confectioners' sugar
1 teaspoon vanilla extract
1/2 cup chopped pecans (toasted if you make the effort.)

As you see without guests, I don't go crazy decorating a cake with tons of icing. Crushed nuts are the finish and enough of a good thing!


You may also enjoy: