I love Indian food, the curry, the spice, but don't make it at home. That's about to change with an easy recipe Crystelle Pereira, the winner of the Great British Bake Off, brought to the Today Show recently. She said it was her grandmother's recipe, so I'll link you to the video here of her making the curry, as well as, post her ingredients and directions so that you and I have a written recipe to follow that won't disappear from the internet as time passes:
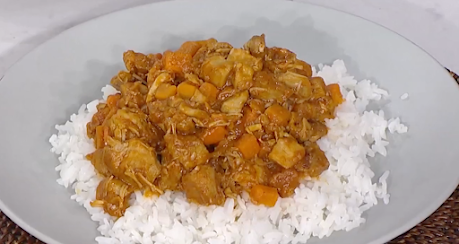
Crystelle Pereira's Pickle Chicken Curry
Ingredients:
 2 tablespoons extra-virgin coconut oil, for fry
2 medium brown onions, finely sliced
1 ½ teaspoons ground coriander powder
5 teaspoons Kashmiri chili powder
4 cloves garlic, grated or minced
8 boneless, skinless chicken thighs (about 1¼ pounds), diced 2 teaspoons fine sea salt
1/2 teaspoon freshly ground black pepper
5 tablespoons ketchup
6 tablespoons apple cider vinegar
2 small sweet potatoes, peeled and diced into small cubes
white rice, to serve
Directions:
1. Heat the oil in a large pan over medium heat and fry the
onions with a pinch of salt until browned. This can take 30 to 45 minutes, but patience is a virtue here.
2. Add the ground coriander, chili and garlic, and fry until fragrant, for about 2 minutes. Add the chicken, season with salt and pepper, and fry for about 5 minutes, until the chicken has browned.
3. Add the ketchup and apple cider vinegar and stir to ensure everything is well combined. Add the sweet potato and stir again. Cover with a lid and cook over low heat for 20 minutes, stirring now and again.
4. Remove the lid and cook down for another 5 to 10 minutes,
until the curry has thickened, the chicken has cooked through, and the potatoes are fully cooked and can be speared with a fork. Taste the curry and season to taste, if needed. Serve with white rice.
I hear many chefs say chicken tights are the most flavorful part of a chicken, but our family prefers breast meat, so I'll likely buy breasts for $1.99/pound, cut them into cubes (with my trusty meat sears), and roll the cubes into whole wheat flour for this recipe. Plus I'll make a side of broccoli or green beans and a salad and serve it with brown (not white) rice. For ambitious cooks, here's a recipe for Naan to complete your dinner. As a lazy cook, I'll simply warm mini flour tortillas (4" size) in the microwave although you could also grill tortillas in a cast iron skillet with a brush of oil and then heated to get them closer to Naan. Soft and warm from 30 seconds in a microwave is also fit to go down the pie hole!
Congratulations, Crystelle Periera, on winning a national cooking competition and publishing a cookbook! I hope some of my readers buy a copy of Flavor Kitchen, and I can't wait to make your spicy dish!!🎉🥳
You may also enjoy: